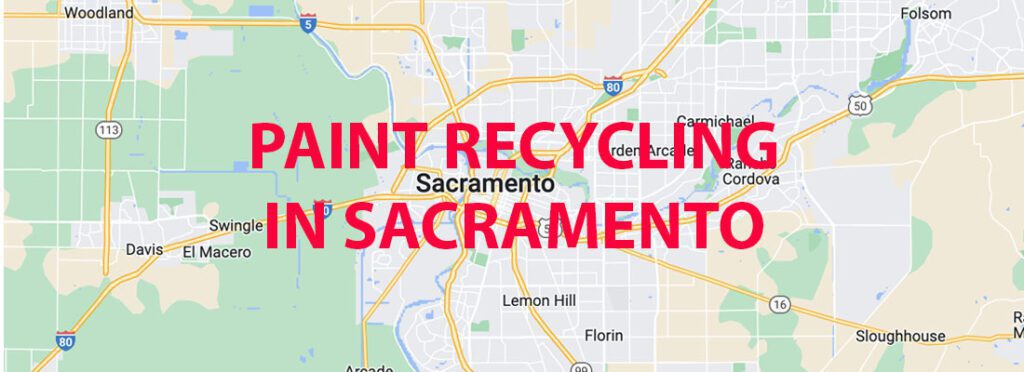
Paint Recycling in Sacramento

Posted on: July 1st, 2022

Paint Recycling in Sacramento

Even the most eco-friendly paints contain chemicals that shouldn’t be discarded into the trash without following the proper procedures. Paint recycling in Sacramento isn’t always an obvious process. This may be the reason so many homeowners have half-used cans of paint stashed in their garage. While we all agree that hoarding paint is better than tossing it out with the trash, it’s just collecting dust and taking up precious space. With that said, many people don’t understand that paint can be reused and recycled. 

Best Paint Stores in Sacramento

Get Free Estimate

The Best Places to Recycle and Dispose of Paint in Sacramento

There are certain Household Hazardous Wastes that you can’t just throw in the trash. In the case of paint, if you don’t want it collecting dust in your garage or attic, what do you do with it? We’ve compiled a list of the free Household Hazardous Waste drop-offs in the Sacramento area. Along with paint, they also accept gasoline, chemicals, pesticides, batteries, antifreeze, fluorescent CFL bulbs, and more. 

Southeast Kiefer landfill’s Special Waste Facility

They accept oils, paints, batteries, antifreeze, and limited other wastes. This facility is operated by Sacramento County for residents and businesses alike. Residents can drop off common household hazardous waste free of charge although there may be a fee for other certain hazardous materials. 

Location: 

12701 Kiefer Boulevard and Grant Line Road 

Sloughhouse, CA 95603 

Hours: 

Tuesday through Saturday 8:30 am to 4:00 pm 

Closed Thanksgiving, Christmas, and New Year’s Day 

North Area Recovery Station’s Household Hazardous Waste Facility

They accept a maximum waste limit of 15 gallons or 125 lbs per trip. 

Location: 

4450 Roseville Road 

North Highlands, CA 95660 

Hours:

Tuesday, Thursday, Friday and Saturday 

8:30 am to 4:00 pm 

Closed Thanksgiving, Christmas and New Year’s Day 

Florin Perkins Public Disposal Site

This is the only third-party certified transfer facility in the Sacramento area. Florin Perkins is certified by the Recycling Certification Institute for C&D (construction and demolition) and the Sacramento Regional Solid Waste Authority.

Location: 

4201 Florin Perkins Road 

Sacramento, CA 

Hours: 

Weekdays from 6 am to 4:45 and Weekends 8 am to 3:45 pm

WM-Sacramento Recycling Center and Transfer Station

The Sacramento Recycling and Transfer Station is Sacramento County’s one-stop shop for your waste disposal needs. It provides safe, reliable, and environmentally friendly services to county residents and beyond. 

Location: 

8491 Fruitridge Road 

Sacramento, California (Across from Depot Business Park)

Hours: 

Monday-Saturday 8am – 5pm 

How Much A Gallon of Paint Covers

Why It’s Important to Recycle Paint 

Most people today use three main types of paints; water-based, oil-based, and latex. Certain paints contain chemicals that can be harmful to both your health and the environment. Paint made prior to 1971 may contain lead and paint made before 1991 may contain mercury. Paints with these chemicals need to be discarded carefully. Oil-based paints are also considered hazardous waste and need to be disposed of at the proper facility.

You can also dispose of water-based paints at a hazardous waste drop-off. It’s actually just fine to dispose of latex paint on your own. It’s suggested that you pour leftover latex paint into a box filled with kitty litter or shredded paper to soak up the contents which can then be easily thrown away with your trash. Empty paint cans can be easily recycled.

What Not to do When Recycling/Disposing of Paint in California

Most of this article will hopefully be helpful in letting you know simple ways to safely dispose of leftover paint. However, you should be aware of a few things you should NOT do with old paint. Do not pour it down the drain or simply throw it out with the garbage unless properly treated first. Air drying is not recommended either because of extreme fume build-up.

Paint Disposal Laws 

The laws concerning paint disposal in California are simple. Paint is prohibited from disposal in landfills and must be recycled or otherwise safely disposed of. California residents and businesses can now even recycle leftover paint for free at some local retail stores such as Sherwin Williams. 

California Paint Disposal Fee 

In the past, the California disposal fee was $0.75 per gallon of paint. Larger than 1 gallon but no more than 5 gallons rose to $1.60. However, as of July 1, 2022, SB 158 eliminates the requirement to pay a disposal fee altogether. 

California Paint Recycling Program 

The PaintCare Recycling Made Easy System in California offers drop-off sites throughout the state where the public can take unwanted paint for recycling. These sites are available to households, government agencies, businesses, and any others with leftover paint. This program is funded by fees that are paid every time someone purchases paint in California, allowing you to drop off your old paint with no charge. 

Paint Recycling in Sacramento Conclusion 

If you live in California and have further questions when it comes to recycling your old or leftover paint, give PaintRite Pros a call. Our expert painters are a wealth of knowledge when it comes to painting and would be happy to answer all your questions.

Resiliance vs Duration vs SuperPaint

The Guide to Water Based Paints

Posted on: May 23rd, 2022

The Guide To Water Based Paints

Water based paint is commonly used on both indoor and outdoor projects for several reasons. It’s easy to clean-up, doesn’t leave behind a harsh odor, and dries extremely fast. So, when is it best to use water based paints over oil based paints? In this article we’ll go over the advantages and disadvantages of water based paints and how to use them for the best results. 

Is Latex Paint Water Based? 

It’s easy to get confused when it comes to painting terms. Simply put, latex paint is often called water based. Latex was introduced in the manufacturing of paint in the 1940’s and entirely revolutionized the paint industry. Latex made it possible to produce a superior quality of paint as well as enhancing its applicability. The synthetic polymer that is in latex paint should not be confused with rubber latex. 

Best Sacramento Paint Supply Stores

Water Based Acrylic Paint 

Water-based acrylic paint is composed of pigment particles dispersed in an acrylic polymer emulsion. Three main components make up acrylic paint:

1. Pigment 

Pigments are the granular particles that give paint its color. They don’t dissolve but instead remain suspended in the paint.

2. Binder 

Binder is the substance that helps pigment remain in place after the paint dries. Acrylic polymer is the binder used in acrylic paint.

3. Vehicle 

This component of the recipe carries the pigment and binder. In water-based acrylic paint, water is the vehicle. When mixed with the binder, it creates a polymer emulsion. Once the water is either evaporated or absorbed, the paint dries leaving behind a clear polymer film full of pigment particles. 

Acrylic paint dries quickly, is flexible and can be cleaned up with water but remains permanent once dry. They come in a range of consistencies and formats to suit a variety of needs and will stick to almost any surface. Acrylics are versatile enough to be used for different styles and painting techniques. With no fumes, they are non-flammable and carry very little odor.

How Much Does A Gallon Of Paint Cover?

When to Use Water-Based Paint? 

There are two types of water-based paints: latex paint and acrylic paint. Each is unique and serves a different purpose. Some types of acrylic paints are predominantly used for crafts and hobbies but we are referring to acrylic paint used for residential home painting. 

While acrylic and latex are both water-based, they each have their distinctions. Before you purchase paint for your project, it’s important to know the characteristics of each one to ensure you bring home the right paint for your needs. 

  • When is Latex Paint Best? 

Latex paint is perfect for vertical surfaces such as interior walls. It provides excellent coverage and is less expensive than acrylic. It’s also more environmentally friendly. Latex paint contains less acrylic polymers which also makes it more affordable to produce. 

  • When is Acrylic Paint Best? 

Acrylic paint contains a higher acrylic polymer than latex paint, making it a bit more expensive to purchase. 

  • When is Oil Based Paint Best? 

Because it dries much more slowly, oil based paints appear smoother and glossier than their water-based counterparts. It also dries with a hard enamel that is more resistant to scratches, dents, dirt, and fingerprints. 

It’s common knowledge that mixing oil and water together isn’t a good idea. When you add oil into water it just doesn’t blend well. Instead, it separates. Painting over a surface that was previously painted with an oil-based paint with water-based paint can be done only if the surface is properly prepped first. For this reason, when painting over a surface that already has oil-based paint, use oil-based paint to repaint the same area as it will adhere better. People typically use oil-based paints for projects such as interior and exterior trim, doors, cabinetry, and popcorn ceilings. 

Pros and Cons of Water-Based Paint 

Water-based paints are extremely popular for good reason. Here is a list of the pros of using water-based paint:

  • Easy to apply- Paint application of water-based paint goes on smoothly due to minimal brush drag. 
  • Color retention- Water-based paints have a significant resistance to paint failures such as chalking, fading, flaking, blistering, and peeling. 
  • Resistant to mildew and mold- Additives in the paint make it harder for mildew to grow and spread. 
  • Dries quickly- Expect a drying time of 1-6 hours which means you can apply a second coat in the same day. 
  • Easy cleanup- Paint can be a real mess to clean up. With water-based paint you only need soap and water to get the job done. 
  • Less odor- Oil-based paints tend to be accompanied by a harsh odor. Water-based paints carry a more mild scent. 
  • Versatility- Water-based paints are commonly used because they are great when working with wood, concrete, brick, vinyl and aluminum siding, stucco, and more. 

While there are so many advantages to water-based paints, there are certainly times when another paint is more appropriate. Here is a list explaining some of the cons of using water-based paint: 

  • If you’re painting in a wet, humid climate, oil-based paints are preferred. 
  • Water-based paints tend not to adhere well to shiny or glossy surfaces such as raw metal. 
  • Temperature sensitive-When painting in cooler conditions (under 50 degrees Fahrenheit), water-based paints become harder to work with. This could cause the paint to not adhere properly. 
  • Primer recommended- It’s always recommended to apply a primer coat when using water-based paint. This adds an extra step that takes more time and money. 
  • Water-based paints can raise the grain when working with un-primed wood. 

Guide to Water-Based Paints Conclusion 

Water-based paints come in both latex and acrylic forms. Both are used frequently for painting home interiors and exteriors. Knowing what kind of paint is right for your project is the first thing you need to figure out before diving in. If you live in the Sacramento-Elk Grove area and have any sort of painting questions, PaintRite Pros can help. Our team of professionals has years of experience painting homes in California and offers only the highest quality painting services. We work extra hard to ensure you’re completely satisfied once the project is complete. We serve the entire area including Woodland, Roseville, El Dorado, Dixon, and more! We do interior and exterior home painting, apartment painting, and commercial painting!

We know you have lots of choices when it comes to hiring a professional painter in Sacramento. That’s why we provide excellent quality and our google reviews show it.

Get Your Free Estimate

Easy Color Coordination from the Experts 

Posted on: December 22nd, 2021

Paint Color Coordination Wheel

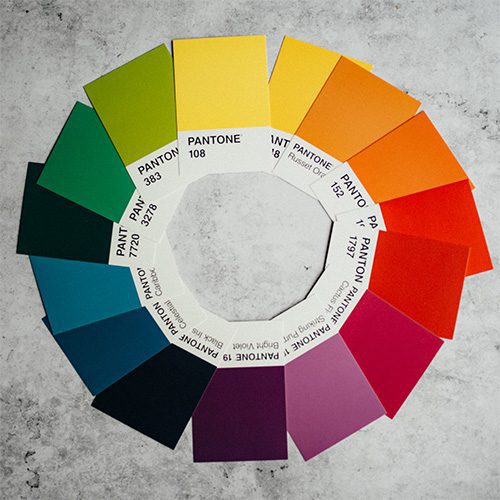
Choosing the perfect paint color coordination when you’re building a new home or updating your paint choices for your existing home can be overwhelming. How do you pick paints that are color coordinated and aesthetically pleasing at the same time? You might now know it, but there’s a science to which colors and tones complement each other and which ones don’t. So, let’s talk about some things to be mindful of when choosing a color scheme. We’ll also go over how to use the color wheel to guide you to your desired outcome.

Live in Sacramento and need professional painters? We’ll give you a free estimate. We serve the whole area including Davis, El Dorado Hills, Stockton, and Vineyard.

Trim Color Ideas

Color Coordination With The Color Wheel 

We all studied the color wheel back in middle school art class. But, maybe we didn’t realize at the time what a helpful tool it could be in pairing interior and exterior paint colors together. The color wheel is essentially divided into two parts. A warm side and a cool side. In general, the warm side tones of orange, red, and yellow, generate energy, warmth, and passion. The cool side hews such as green, blue, and purple, tend to create a sense of tranquility and calmness. You can use the different color combinations and patterns of the color wheel to help you choose colors that intrinsically work well together. The basic color combinations are as follows:

  • Complementary Colors 

Complementary colors are pairs of colors directly across from each other on the color wheel. These colors, when mixed or combined together, cancel each other out by creating either white or black. In the case of complementary colors, opposites attract. This color scheme results in a high contrast that is bright and really pops. These combos are bold so you have to be careful not to go crazy or your result will appear too loud. Red and green, orange and blue, yellow and purple are all examples of complementary color combos. It makes sense why sports teams choose these energetic and bold combinations as a winning formula for their representation. 

  • Triadic Colors 

Triadic color schemes are found by drawing an equilateral triangle on the color wheel which means each color is evenly spaced apart. The two most well-known combos are the primary colors, red, blue, and yellow, and the secondary colors which are orange, purple, and green. Typically, one color of the three will be dominant while the other two work as accents. 

  • Analogous Colors 

Analogous color combinations are groups of three that are found on any given side of the color wheel. Tones often found in nature, create a sense of harmony and serenity that is pleasing to the eye. This color scheme lends to a monochromatic look with depth and richness.

Popular Paint Colors and How To Use Them 

With the science of the color wheel on our side, let’s walk through some of the most popular paint colors on the market today and the do’s and don’t with each particular shade. Neutral tones typically make for the most popular colors but paying attention to the undertones will steer you away from unsightly matches. 

  1. Agreeable Gray by Sherwin-Williams SW7029 

Agreeable gray is a luxurious neutral paint color by Sherwin-Williams. Honestly, this color is so versatile that there isn’t a shade it doesn’t compliment. Its base is gray with a hint of beige. It tends to appear warmer in bright lighting and a little grayer in cool lighting or darker spaces. Now that warmer gray hews are on the rise when it comes to popularity, Agreeable Gray is in its prime! Because of its warm undertones, agreeable gray coordinates nicely with Sherwin-Williams’ Extra White, Coral Rose, and Incredible White. 

  1. Urbane Bronze by Sherwin-Williams SW7048 

Despite its dark appearance, Urbane Bronze is actually a very dark gray with bronze undertones, giving it a luxurious and sophisticated feel. In certain lighting, it can look dark brown, murky gray, or even give off a green sheen. A bold neutral, Sherwin-Williams pairs it with Extra White, Ivoire, and Shaji White. 

  1. Repose Grey by Sherwin-Williams SW7015 

Repose Grey bears some resemblance to Agreeable Gray and they both work in virtually any room in your home. It’s a warm gray that pulls cool in certain lighting. The slight blue and very light purple undertones can make it look a little cooler than some other greige colors. But, Repose Gray is overall a warm gray because its brown undertones overshadow the hints of blue. People love repose grey and use it to paint everything from kitchen cabinets, bathrooms, and living spaces, to their exterior siding and brick. Sherwin-Williams recommends pairing with Paverstone, Coral Clay, and Elder White. 

  1. Revere Pewter by Benjamin Moore HC-172 

We’re all aware that there are endless colors of gray paint available on the market. But, not all grays are created equally. There are warm greys, cool greys, grays that look blue, grays that look green, and so on. Revere Pewter is one of the top-selling grays out there mainly because of its versatility and warm undertones. The great thing about this color is that you can pair it with warm and cool colors alike. White Dove by Benjamin Moore is the perfect compliment to Revere Pewter. 

  1. Mindful Gray by Sherwin-Williams SW7016 

Mindful Gray is another neutral favorite and a bit different than the other greige hews. While mindful gray is a warm color, it has hints of green and sometimes taupe undertones. In a dark room, the green is more prominent. The more natural light in your room, the warmer the gray will appear. Wood tones will also add to the strong green undertone of Mindful Gray. The paint colors that are suggested by Sherwin-Williams to compliment Mindful Gray are Pearly White, Homburg Gray, and Elder White. 

  1. Hale Navy by Benjamin Moore HC-154 

There is just enough navy in Hale Navy to give it the perfect amount of depth without any green undertones. Even though navy is considered a cool color, this particular color pairs well with both warm and cool tones. Hale Navy is used time and time again because it simply goes well with everything. Because it can appear almost a charcoal gray in darker lighting and smaller spaces, you can even pair it with black paint and be thrilled with the results. 

When you want to be bold and stand out, try painting the exterior of your home Hale Navy. You might worry about going with a dark color for your exterior since they’ve been known to fade over time. But, paint has come a long way and most paint comes with up to 15 years’ worth of protection without having to pay to have it upgraded. Since navy looks so good against white or cream trim, some suggested color pairings could be Wish, Gray Owl, or Woodmont Cream. 

  1. Manchester Tan by Benjamin Moore HC-81

If you’re looking for a warm, neutral beige wall color, your search stops with Manchester Tan. It’s timeless and far from boring. Lighting, color contrast, and furnishings will all play a part in knowing if this color is right for your space. While it’s neutral with a yellow base, it does have a very subtle green undertone. Be careful when pairing with colors harboring pink or red undertones. Consider Woodlawn Blue or Guilford Green as nice pairing colors to Manchester Tan. 

  1. Navajo White by Sherwin-Williams SW6126 

Not a stark white, Navajo White is a warm, cream color with yellow and beige undertones. Some people are afraid to use it in their homes as the current trends lean toward the cooler tones of blues and greys. Reds, browns, and taupes were all the rage in the ’90s and early 2000s. If you want to temper down the warmth of the yellow undertones, try pairing it with a medium-toned gray. The cool gray will tone down the Navajo White while complimenting it at the same time. By bringing together opposites, you bring depth to your space and keep it from becoming monotone. Colors that compliment Navajo White nicely are Row House Tan, Rita’s Rouge, and Creamy. 

Color Coordination Conclusion 

If you’re considering painting the interior or exterior of your Sacramento area home but have questions about colors, give PaintRite Pros a call. Our trained experts will be happy to give you a free color consultation and go over all your options. We understand the value of what it means every time someone chooses a painting contractor. That’s why we try our absolute best to ensure you’re happy with the finished product. We also have people who speak Espanol if you prefer that as well. 

See Areas We Serve

Get Free Estimate

How Long Does Paint Last? 

Posted on: October 25th, 2021

How Long Does Paint Last?

Most homeowners tend to have several cans of leftover paint in their garage. But just how long is paint good for? Throwing away leftover paint after finishing a project isn’t wise in case you need to do touch-ups in the future. And it’s always better to have more paint than you need. So it’s a good idea to know how long paint lasts. There’s no sense in all those number 10 paint cans taking up room on your shelves if it’s all dried up when you go to use it. So let’s go over how to properly maintain and store paint and how to know if it’s still usable. 

How Long is Paint Good For? 

There are a few factors that will determine how long your paint is good for. It depends on whether or not you stored it properly and what type of paint it is. Paint that has never been opened, latex or oil, will typically last about three years. If you store a can of opened paint in the correct way, it most likely will last a couple of years. 

How Do You Store Paint? 

No matter what kind of paint you are using, you can save and store the leftovers. The most important thing to remember is to keep it from exposure to air. Here are some simple yet effective steps to keep in mind when storing extra paint: 

  1. Wipe away all excess paint from the edge of the lid and top of the can’s rim. This ensures a tighter seal to keep out air. 
  2. Replace the lid. 
  3. Place a piece of wood or another flat surface on top of the lid before hammering it back on. This allows the lid to go on evenly, creating a more efficient seal.
  1. Use a sharpie to mark on the can what area or room you used the paint for and the date and year you used it. You’ll be really glad you didn’t skip this step after several years have passed. 
  2. Store leftover paint in an area where the temperature never falls below 50 degrees or goes above 90 degrees Fahrenheit. For most people, this rules out the garage or attic as prime conditions for storage. Store away from furnaces or other heat-generating appliances.

Does Paint Expire?

Yes, paint does expire but since your can doesn’t come with an expiration date stamped on it, how do you know when it’s gone bad? The life of your paint is largely determined by what type of paint it is. Latex and oil-based paints are what most homeowners use. 

  • Latex Paints –This type of paint dries faster than oil-based paints, but it’s less durable and less shelf-stable. Latex paints will last up to 2-10 years. 
  • Oil-Based Paint- Oil-based paints will last between 3-11 years if stored properly. While oil-based paints take longer to dry, both while using it and in storage, it’s a more durable paint option. 

How to Tell if Your Paint is Bad

For the most part, it’s pretty straightforward when it comes to knowing your paint is bad. If it’s dried out, chunky, or smells odd or even fishy, don’t try using it. Also, if it separates after being stirred or has a strange consistency, it’s time to dispose of it. 

How Long Does Paint Last in a Bucket? 

It isn’t a good idea to store your leftover paint in a 5-gallon bucket. If you end up with less than a gallon after painting the exterior of your home or another large project, consolidate what you have. Transfer your remaining paint into a smaller container that will seal tightly. Just be sure to transfer the paint code, name, and date used so you will have that important info down the road. 

How Long Does House Paint Last? 

Despite the fact that exterior house paint contains a higher number of VOCs than interior paint, that doesn’t make it have a longer shelf life. Exterior paint follows the same rules and guidelines as interior paint when it comes to storage and longevity. 

Conclusion on How Long Paint Lasts 

When you need answers to painting questions, turn to PaintRite Pros. We are the top-rated painters in the Elk Grove-Sacramento area including Davis and Stockton. Our services include kitchen cabinets, interior, and exterior house painting, garage floor epoxy, commercial painting, and more. We strive to live up to the claim of providing you with only the highest professional services. Our experience and dedication are unmatched. We don’t just want you to be satisfied with our work, we work to ensure we are also proud of the work we have done. Give us a call to get a free estimate today!

When Should You Use Elastomeric Paint? 

Posted on: March 2nd, 2021

What is elastomeric paint? 

If you have been looking for a paint that forms a barrier against moisture, then elastomeric paint is definitely the one you should consider. Elastomeric paint is a coating specifically made to protect masonry surfaces. Like other paints, it is applied in liquid form, which then hardens into a flexible, watertight covering. This paint can stretch and return to its original form without causing damage if applied correctly.

Do I Have To Prime Before Painting?

What is elastomeric paint?

Benefits of using elastomeric paint 

Watertight

One of the best reasons to use elastomeric paint is that it places a secure coating on the surface you are painting. This coating creates a barrier so that moisture is unable to penetrate the walls. This will work well on surfaces such as masonry, stucco, poured concrete, roofs, bricks, wood, and metal. 

Long-lasting

The strong makeup of elastomeric paint gives it much more longevity than ordinary paints. It will last upwards of ten years when applied properly. 

Bendable

Elastomeric paint is made up of a stretchy material. It can move with whatever structure it is placed on. This means it can shift with a wall or roof from the changes associated with climate changes. 

Density

This paint can be up to ten times thicker than your regular paint and it shows in the end result. 

Protects

Strong rains driven by the wind can often harm paint coatings. Elastomeric paint is made to weather these storms far better than your conventional paint. 

Although elastomeric paints have several benefits, it’s not always necessary to use when painting your home. Here are some examples of when this is the case. 

  1. If you aren’t concerned with waterproofing your stucco, using a masonry primer and a double coat of quality paint will give you great results at a lower price.
  2. Electromeric paint is a high build paint. If you already have multiple coats of paint on your stucco, adding an elastomeric coating could prove too heavy and pull away from the stucco. 
  3. If your home currently has a quality coating and your paint job is in good condition, regular exterior house paint can do the trick.

Drawbacks to be aware of 

There are a few negatives with using elastomeric paint or coating. The first being that it is expensive. It may cost up to 50% more than your regular paint but it does cover much more effectively. Since elastomeric paint is very different then your standard paint, it can be more difficult to work with. If not applied correctly it can also leave you with unwanted lumps in your finish. 

How Long Should you Wait Between Coats of Paint?

What paint is the best for stucco? 

Everyone has their own opinion about what paint is best to use on stucco. But, it is important to remember that there is more than only one that will work well. 

There are three main types of paints that we recommend for stucco.

1. Acrylic Paint 

2. Masonry paint 

3. Elastomeric Paint 

Stucco requires paint that is able to expand and contract. Also, it should be extremely durable, mildew and dirt resistant, waterproof, and have good elasticity to help resist cracking. 

We do not recommend any oil-based paints for stucco walls! 

If you live in or near the Sacramento area and are going to be taking on a painting project, give our painting experts at PaintRite Pros a call or click here for a free estimate. Our friendly team of painters will be happy to answer any questions you may have. We also offer free color consultations. Let our years of experience go to work for you. We serve Woodland, Folsom, El Dorado Hills, Stockton, and more! We even have fluent Spanish speakers if you or someone you know needs it! Or if you live in the Boise area, we know some great painters out there too!

Best Interior Paint Colors for Selling a House 


Get Free Estimate

Paint Sheen: What Is It and Why Does It Matter?

Posted on: September 21st, 2020

If you’re looking to spruce up the interior of your home, you likely have the question, “what is paint sheen.” In painting terms, paint sheen is the glossiness of a paint finish. Glossy paints are shiny and reflect more light, while on flat paints most of the light diffuses in a range of angles. 

What are the different paint sheens? 

  • Gloss 
  • Semigloss 
  • Satin 
  • Eggshell 
  • Flat or matte 

Most brands of paint come in several sheens. Gloss sheens have the highest light-reflective characteristics. Next would be semigloss sheens followed by satin and eggshell which are low luster sheens. Lastly, you have flat or matte finishes. 
BEST INTERIOR PAINT COLORS FOR SELLING A HOUSE

What is Paint Sheen?

How do I know what paint sheen to use? 

There’s a rule of thumb to follow when picking paint sheens. The higher the sheen, the higher the shine. The higher the shine the more durable the paint. High gloss sheens are a good choice for areas that sticky fingers will touch such as cabinets, trim, and doors. But high gloss is too much shine for most interior walls. 

Satin finishes are the most commonly used paint for interior walls. They are easier to clean than flat and eggshell paints, which makes them a great choice for high-traffic areas like kitchens, bathrooms, family rooms, and playrooms.  

 While both eggshell and satin are a little less durable, they are both excellent choices for your living room areas. Spills and drips can be easily cleaned or wiped off with a rag.  

You should think about using flat or matte sheens on walls or areas that tend to have a lot of bumps, scratches, or holes because it can hide these blemishes and imperfections really well.  

Best Sheen for painting a brick fireplace 

When painting a brick fireplace, you will want to start by using an indoor acrylic-latex blend paint. The paint needs to be able to withstand high temperatures. As far as what sheen to go with, eggshell is a lower sheen and gives off a warm glow. It is easy to apply and is great at concealing imperfections. Also, purchase a paint roller designed for textured surfaces. This will help cover the likely rough and porous surface of the brick.  

Which paint sheen is best for painting bathrooms? 

Satin is the best go-to sheen for bathrooms. It is more durable and shinier than eggshell, which makes it easier for you to keep clean. Use it for walls, ceilings, and even the trim, because many satin finishes are tougher than they once were. Paints with shinier finishes are the best choice for bathroom spaces that are notorious for large amounts of moisture and potential mold and mildew. A common mistake then is choosing a flat finish for your bathroom walls. 

What paint sheen works best for kitchen cabinets? 

Most people find satin or semi-gloss paint works best for kitchen cabinets or any woodwork in your kitchen. This will give your cabinets a soft sheen that doesn’t look flat. It is also very resistant to scrubbing, making it the perfect choice. Easy maintenance is essential for high-touch areas like cabinets. 

Paint Sheen For Kitchen

The most used sheen of interior paint 

So which sheen is used most often when it comes to interior paint overall? Semi-gloss and eggshell are the most popular. They are a good choice for walls, woodwork, doors, and hallways and meet in the middle with a moderate sheen that isn’t too extreme. 

Conclusion 

Hopefully, you now have a better understanding of the different paint sheen options that are available and know when best to use them. If you live in the Sacramento area and find yourself needing any help with painting projects, feel free to contact us at PaintRite Pros. We will give you a free quote and help in any way we can. Not only do we have employees who speak Spanish fluently but we also serve the entire area including Dixon, Roseville, Vineyard, Laguna, Woodland, and more!
HOW OFTEN SHOULD YOU REPAINT INTERIOR WALLS?

GET FREE ESTIMATE

 How to Clean Walls with Flat Paint 

Posted on: September 8th, 2020

Learning how to clean walls with flat paint is fairly simple and easy to do. You just need to have a few household cleaning supplies and a few simple tips to get you going. 

What are the Benefits of Flat Paint? 

Flat or matte paint delivers a smooth, subtle look and shows very little sheen when dry since it absorbs light. Because it covers so well, flat finishes cover up blemishes and imperfections sometimes caused by poor quality work done by contractors or framers. Using flat paint keeps these minor imperfections from being so noticeable and makes it an excellent choice for your walls. This is why it works great in bedrooms, living rooms, dining rooms, and ceilings.  

Do I Have To Prime Before Painting?

Things to Watch Out For 

The drawback to flat paint is that it’s very quick to smudge or scuff and isn’t very durable. The trick to cleaning your walls when this happens is to start by doing as little as possible. You should also take further measures as needed so you don’t damage the integrity of the finish. If you start by trying harsh treatments or chemicals, you will more than likely not get the results you were hoping for. In this instance, less is definitely better than more. 

What Supplies will you need? 

  • Warm water 
  • Clean rag or soft cloth 
  • Mild detergent 
  • Vinegar 
  • Cleaning pad or eraser 
  • Touch up paint and paintbrush 

How to Clean Walls With Flat Paint

Here are some simple yet highly effective methods to get rid of those ugly scuff marks or stains from your flat paint walls. These tips will help you do it without damaging your paint: 

  1. Cloth and Sponge: The first thing you should try is warm water and a clean cloth or sponge. Sometimes just water alone is enough to remove stains. Try gently rubbing the area and see what happens. Make sure you clean dirt and stains from flat paint walls as quickly as possible. The longer you ignore them, the harder they are for you to clean!
  2. Vinegar and Water: If warm water alone doesn’t do the trick, try adding a very small amount of vinegar to your water or even a few drops of mild detergent 
  3. Specialty Sponges: If the stain still persists you can try using one of the melamine-foam-based white sponges such as the “Magic Eraser” or the “Easy Eraser”. They are non-abrasive and are not likely to mar flat-painted surfaces. But be careful because as these sponges wear down, they have a tendency to leave a white residue on walls that are darker colors such as dark grey, navy, brown, or green.  
  4. Touch Up Paint: A can of touch-up paint may come in handy right about now if nothing else has fully removed the stain. Flat paints are much easier to touch up than semigloss or satin. You just want to make sure the paint on your wall isn’t faded or dirty so the spot you are touching up will match perfectly after the touch-up paint has dried. 
  5. The Last Resort: Last but not least, if all your previous methods have failed, and you have enough matching paint, you can always resort to repainting the entire wall. This will obviously take you more time and prep work but might be worth it in the long run to give you the desired look of a beautifully clean wall. 

Conclusion

There you have it! Now you know how to clean walls with flat paint. If you end up needing to repaint your walls and you live in the Sacramento area, contact us. We serve the entire Sacramento area with interior and exterior painting services. We’ll give you PaintRite Pros for a free quote and we’re always happy to be of service! 

Get Free Quote

How to Paint a Deck

Posted on: August 31st, 2020

When you’re learning how to paint a deck, there are several important things to know and do. We go over those here. Though most homeowners prefer to stain deck boards, painting is a great way to add a splash of color to your outdoor space. Painting your deck opens up a world of opportunity for you. No more are you bound to a solid stain hue. With deck paint, the sky is the limit when it comes to patterns and colors. This allows you the luxury of truly making the space your own. 

If after reading this, you decide you’d like to hire a painting company to help you, we’ll give you a free quote. We have offices in Sacramento and Las Vegas.

How Much Does It Cost to Paint a Deck?

One of the first steps in painting your deck is figuring out how much you can expect to pay. Experts agree that the average cost to paint a deck is between $2 to $5 per square foot. This means that if your deck has a surface area of 300 square feet, it will cost approximately $1,050 to complete. However, this cost is variable and will rise or fall based on several factors including:

  • Labor costs to hire a professional
  • Condition of the deck boards
  • Quality of the paint selected

However, if your deck has already been painted, the cost may be higher. This is because of the additional cleaning and prep required to get the surface ready for a new coat of paint. A pressure washer may be required to help get the deck boards thoroughly rinsed of any debris. 

Deck Paint Pricing

Deck paint varies in price with $40 per gallon being the least you can expect to pay. Some higher quality paints may cost you $60 per gallon but others can be much less expensive. Each gallon of paint is rated to coat from 125 to 300 square feet. Paint coverage will be dependent upon the condition of the wood as well as the color you choose. 

If you want to save a little money on your deck painting job, it’s a great idea to consider this a DIY project. However, hiring a professional is often well worth the extra dollars. Our professional deck painters are careful to prepare your deck and make sure the paint will properly adhere. This ensures an even and more durable finish, saving you both time and money. 

Professional painters, including ours, are well versed in all aspects of deck painting. This expertise allows them to select the right paints to withstand all weather conditions including the hot, dry air in Las Vegas that you’re accustomed to. They also are up to date on the latest techniques and products to improve the longevity of deck painting jobs. 

How to Paint a Deck with Peeling Paint

Peeling paint is a common problem many homeowners face. To add a new coat of paint to your deck, you must first get rid of the old flaking paint. 

There are a few simple steps to helping you get your deck ready for painting. They include:

1. Scrape all peeling paint

You must first remove all flakes of paint from your deck before you can prepare the surface. A stiff brush or a scraping tool does the job well. 

2. Sand the deck

Be sure to sand all areas of the deck where paint chips have been removed. You need the surface to be completely smooth. 

3. Clean the deck boards

Once the surface has been sanded, you’ll need to clean it to remove any dirt. If any debris remains on the deck boards, the paint will not stick to that area. After the deck has been power washed, you must wait a minimum of 24 hours for the wood to thoroughly dry. You can then proceed to the next step: applying the paint. 

4. Paint the deck

When the deck’s surface is clean and dry, you may then begin painting. Thankfully, there are several different methods you can choose from. A brush or roller does an excellent job. For speedier results, consider a paint sprayer. 

5. Allow to dry

Allow the paint to dry overnight or up to 24 hours, depending on your climate. You can then apply a second coat if needed. 

How to Remove Paint from a Deck

If you need to completely remove a coat of paint from your deck, you’ll want to use a stripper. Unfortunately, removing paint from a deck with a stripper involves some mess. 

Strippers come in gel form and are applied to a deck to soften old paint. Once the paint is softened, it can then be rinsed away with a pressure washer or hose. 

However, though strippers do an excellent job, they don’t always get rid of the old paint in one shot. Sometimes, it is necessary to scrub the surface with a stiff brush then reapply the stripper for a second attempt. The deck then needs to be cleaned and allowed to completely dry before applying any paint. 

Can You Paint Composite Decking?

Composite decking is designed to be low maintenance. Its attractive appearance is reminiscent of wood. But if over time you’re thinking a change is in order, you’re likely wondering—can you paint composite decking?

Yes, you can paint your composite deck. This particular type of deck, also sometimes referred to as Trex decking, is intended to never need painting.  However, the surface will accept paint readily. As with wooden decks, you’ll still need to clean, prep, and prime the surface first. 

To paint your composite decking, follow these easy steps:

  • Remove or cover any plants on or near the deck
  • Clean the deck using household cleaners and a power washer
  • Sand the deck to a smooth finish
  • Prime the surface
  • Paint the deck

Thinking of giving your deck a new coat of paint? Follow our top tips to get the job done right or contact us for a free estimate if you live in the Las Vegas or Sacramento areas. 

Should You Paint or Install Floors First?

Posted on: August 24th, 2020

Should you paint or install floors first? If you’re renovating a room in your home, you’ll need to decide which comes first: painting or installing new floors. Most people think that painting should be done first to prevent any spills from marring brand-new flooring. However, experts agree that new flooring should always be installed before you have any interior painting done. If you live in the Sacramento area, and you’d like a professional company to help you install or paint your floor, contact us for a free quote! We serve the entire area including Stockton, Folsom, El Dorado Hills, and Elk Grove. 
FREE ESTIMATE

Why Is it Better to Install Flooring Before Painting?

It’s a natural assumption that painting should take place before installing flooring. However, the opposite is true, and we’re going to tell you why. 

There are several tasks that must be undertaken before laying new flooring in a room. Many of these jobs can cause damage to walls, meaning repairs are necessary. 


fAmong the steps you’ll need to follow before installing flooring include:

1. Removing the old flooring or carpet

Tearing up old carpet or flooring is a very messy job. When removing the old flooring, you’ll likely unearth a vast amount of debris, dust, and dirt. If you choose to paint first, these particles can land in your fresh coat of paint, marring the finish. 

When the flooring is newly installed; often, some damage to the walls can occur. This can leave your newly painted walls with unsightly marks and blemishes. When this happens, you’ll need to repair your walls and apply touch-up paint. These additional steps cost you both time and money, making it clear why flooring before painting is the best idea. 

2. Replacing or repainting trim

Depending on the type of flooring you’ve purchased, removing your baseboards and trim is usually necessary. Once you’ve removed these items, they may require repainting and some repair. When the trim has been reattached to the walls, the nail holes will need to be filled and touchup painting is done.  

By choosing to install flooring before painting, you give yourself the opportunity to do all of your painting in one shot. This is much more efficient and cuts down on the amount of mess involved in the project. 

Some trim and baseboards will need to be installed slightly higher than what was previously in place. If you’ve decided to do your painting first, you may find yourself with an area that still bears the old paint. This would mean a second application of paint is necessary to ensure the entire surface is covered. 

3. Preparing the walls before installing flooring

Depending on what the condition of the walls are, it is a good idea to do all preparatory work before the flooring is installed. This includes any patching, sanding, or wallpaper removal that can be messy and leave behind dirt or debris.  This is a particularly important step if you plan to apply epoxy basement flooring. 
GET MORE INFO

4. Masking 

Once the new flooring has been installed, you’ll be able to protect the surface through the use of painter’s tape and drop cloths. These two items are valuable tools that keep mess to a minimum and protect your floors. 

Most professionals consider painting to be finish work. As a result, they prefer leaving it until the end of the job. With the right precautions in place, installing flooring before painting poses no risk of damage. 

Does the Type of Flooring Make a Difference?

Different precautions must be taken for each type of flooring installed in your home. However, this does not change the fact that when it comes to painting first or flooring first, flooring takes the top position. 

Though some types of flooring such as finished hardwood can simply be installed as-is, unfinished hardwood will need to be stained then sanded. Stain can easily splash on walls, ruining a fresh coat of paint. If the correct amount of drying time has not been allotted, dust and wood shavings can get into the paint on your walls, ruining the finish. 

If your home renovation project includes refinishing existing hardwood floors, it becomes that much more important that your flooring takes top priority over overpainting. Refinishing hardwood involves a lot of sanding and buffing, two jobs that make a lot of mess. 

What If I Want to Install Epoxy Basement Flooring?

What should come first paint or epoxy basement flooring? Epoxy basement flooring still takes the number one position overdoing any painting to the room’s walls. Installing this type of flooring is a multi-step project with curing times required between coats. As with installing other types of flooring, the finished floor can be covered with tarps or drop cloths to protect from wall paint spills. 

Epoxy floors also require a layer of sealant. Any debris, dust, or dirt that falls in the sealer will become a permanent part of the flooring. This means that all walls should be prepared for painting prior to beginning the epoxy process. We also offer painting services for kitchen cabinets, fences, exterior, commercial spaces, and apartments. If you live in Sacramento and decide to install your floors first, we recommend reaching out to LNL Construction

How To Epoxy Your floor

How Long Should You Wait Between Coats of Paint?

Posted on: August 14th, 2020

How long should you wait between coats of paint?

Planning to do some repainting at your house? One of the first steps is figuring out how much paint you’ll need to get the job done. But it’s not just the amount of paint that needs consideration when repainting a room. Paint that isn’t allowed to dry before the application of a second coat is likely to peel, streak, clump, or flake when dry. Experts recommend leaving a minimum of two to four hours of drying time between each coat for best results. 

If you live in Sacramento and decide you’d like to hire professional painters to do the job, we’ll give you a free estimate. We serve the entire Sacramento area including Folsom, El Dorado Hills, Stockton, and Woodland.

How Long Does It Take for Paint To Dry?

What Can I Do to Ensure an Even Second Coat?

A second coat of paint is important to ensure even distribution on the walls. Two coats also ensure the paint is more durable, making it resistant to chipping and fading. 

There are several things to consider in applying your second coat. These include:

1. Curing time

Relying on touch alone is not an accurate measure of whether or not your walls are ready for a finish coat of paint. Each coat requires additional time to set. The type of paint also plays a determining role. Latex paint requires only two to four hours to cure. Oil-based paints can take up to 24 hours between the first and second coats. 

2. Treatment of tools

If paint rollers or brushes are left open to the elements, they can begin to dry. When this happens, it is difficult to coat a roller or brush for a proper application of the second coat. This means the surface of the finish coat may be uneven. For best results, cover all painting tools with plastic wrap and place them in the refrigerator. 

3. Painting technique

In order to ensure an even application, paint should be applied to the walls in the same pattern as the first coat. Experts recommend first cutting in all edges. When all edges have been neatly coated, you can then use a roller to paint the walls in a large W. This can then be filled in with painted by rolling in an upwards and downwards fashion to ensure even distribution of color. 

4. Color consistency

Dark paint colors contain a lot of pigment that can settle to the bottom of the paint can when resting. Be sure to stir the paint very well before pouring it into a paint tray to load the roller. 

Trim Color Ideas

How Many Coats of Paint Do You Need?

Typically, interior walls only need two coats of paint: a first coat and a finish coat. However, dark paint colors may require an additional application to ensure an even finish. 

Some variables that can affect how many coats of paint you may need are:

1. Painting the same color

If you are simply refreshing the same paint color, one or two coats are all that should be necessary. 

2. Painting a new color

If you are painting a room an entirely new color, the number of coats of paint will vary. Dark colors will require a minimum of two coats. However, applying light paint over something dark in pigment may necessitate as many as six coats to cover completely. Using a primer will dramatically cut down on the number of coats required to cover a dark wall color with light paint. 

3. Paint quality

It is quite true that you get what you pay for. Cheap paint is often thin, meaning more coats are required to get a good result. Opt for the best quality paints. They will cost more money but save you time. 

If you follow these steps, you should have no problem painting your walls. You shouldn’t have to worry about things like “how long should you wait between coats of paint,” “what can you do to ensure an even coat,” etc. If you decide you’d like a professional to paint your walls for you, and you live in the Sacramento areas, give us a call or click here to get a free estimate. We even have Spanish speakers if you or your friends only speak Spanish. Whether you need interior or exterior painting at your home or business, nobody will do a better job than us. We also offer a host of other painting services at your home including cabinet painting, garage floor epoxy, and fence painting. If you live in the Boise area, we recommend hiring Boise Home Painting for your painting needs. Tell them we sent you!

Do I Have To Prime Before Painting?


Professional

Painting Services

Have questions about your residential or commercial painting needs? Contact us online or give us a call at 916-667-8050 to request a free estimate appointment.

Call Now