The Best Bathroom Paint Colors for Your Home

Posted on: October 6th, 2022

The Best Bathroom Paint Colors & Ideas

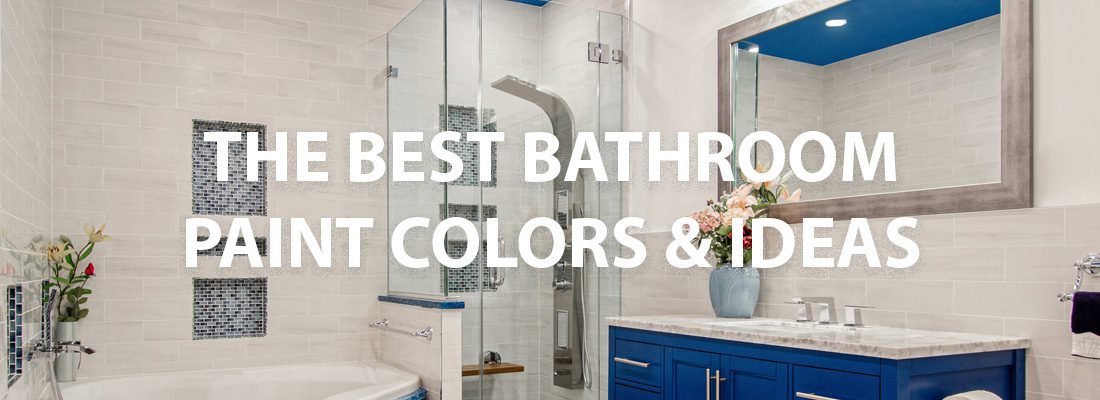
It can be a daunting and overwhelming task to choose the best bathroom paint colors for your home. Do you follow your own style and go with a color you love or follow the trending colors that can boost the resale value of your house? Bathrooms tend to be very personal spaces so it’s important that you choose a style that matches your personality. It’s helpful to figure out what vibe you’re going for and that will help narrow down your color choices. In this article, we’ll go over different bathroom paint ideas as well as the best colors for resale value to ensure you choose a bathroom paint color you fall in love with.

If you live in the Sacramento area and need your bathroom painted, click the button below to get a free estimate. We serve the entire area including Dixon and Stockton. We can also paint your home’s entire interior including the cabinets!

Free Estimate

Do You Paint Walls or Trim First?

Best Bathroom Paint Colors

Ultimately, you get to choose the paint color for your bathroom that you feel best suits the style or look you’re envisioning. However, if you’d like some suggestions from professional painting experts on the best bathroom paint colors, you’ve come to the right place. Below is a list of our top bathroom paint color recommendations:

  • Creamy White

Creamy white is a great choice when bright white is just a bit too intense for your liking. This classic version of white is timeless and warm and pairs nicely with black for a stark contrasting look or other softer accent colors such as pale yellow or soft pink. 

  • Soft Blues

When it comes to bathrooms, you can’t go wrong with a soft blue. You can’t help but feel calm and relaxed when surrounded by this cool neutral. Try using a dusty or powder blue as your base color or even as an accent. Pairing blue against white tile or trim completes a dreamy look. Because blue is reminiscent of both the sky and water, it’s no wonder blue just keeps rising in popularity as the perfect color for a bathroom. 

  • Black or Charcoal

The dark, bold tones of black or charcoal may not be your first thought when it comes to bathroom colors. However, more and more homeowners are discovering the unique charm of these dark hues. If you’re looking for a dramatic and moody look, give charcoal a spin. Paired with white or cream, the black tones can create a bold, contemporary look or come off as very sophisticated. Whether you choose to tone it down or pair it with a soft, warm shade, the possibilities are endless. 

  • Warm Earth Tones

Warm earth tones are cozy and grounding. Colors such as beige, taupe, terra-cotta, and grays are timeless. These preferred colors are the perfect complement to rich wood finishes or natural stone tile countertops often found in bathrooms. 

  • Light Gray

Light gray is in close running with light blue in the bathroom paint popularity contest. Because gray can be either warm or cool, there are endless ways to utilize this sometimes understated color. Since light gray pretty much goes with everything, you can pair it with brighter tones such as yellow or teil or keep things simple with neutral or wood accents. 

  • Neutrals

Most neutrals reflect light to brighten your space and create a clean and calm look. If you’re thinking that neutrals are too basic or boring for your style, try layering different shades of the same hue throughout your room. This can be accomplished by utilizing flooring, rugs, wall accents, tile and trim accents, and more. 

But remember that neutral bathroom colors aren’t limited to white and beige tones. A wide range of textures and tones can add personality and dynamic contrast to your go-to colors. Add shiny finishes to create subtle details without taking away from a sophisticated feel. 

Color Coordination Tips

Best Colors for Resale Value

Are you considering putting your home on the market in the near future? If so,  you’ll want to be aware of what colors will up your resale value and what colors may make selling your home more difficult. 

Currently, painting your bathroom light blue can increase the value of your home by $5000. A light blue hue invites a calm, serene, and relaxing environment that compliments almost any decor or design style. Light yellow, cream, beige, and gray are also favorites of prospective home buyers. We recommend avoiding reds, pinks, and greens as paint choices if you want to get top dollar for your home. 

Best Colors for Different Types of Lighting

If you’ve ever done much painting around your home, you understand that varying degrees of natural and artificial light plays a big role in how a paint color will show up. No matter what interior room you are painting, it’s important to consider the quality and source of light for that space. 

When you’re looking for paint colors to use in low-light rooms, go with shades that enhance its sense of space. 

How Natural Light Affects Colors

Natural lighting comes and goes throughout your home each day as the sun rises and eventually sets. These changes in light can drastically affect how a color appears in a certain space. As the angle of the sun changes, so can the color of your walls. For this reason, it’s always best to look at paint samples in natural light before committing.

Generally speaking, if your room faces North, it will let in a soft light producing a warm effect. This means that your dark-colored paints will appear darker than normal and your light colors will also be more dim. For rooms with natural light we recommend the following colors:

  • Light blue
  • Sage Green
  • Pale Yellow
  • Lavender
  • Pale Pink
  • Black
  • Plum
  • Navy

How Artificial Lighting Affects Colors

Artificial lighting from light bulbs also has a profound effect on paint color. Keep in mind that the same paint color will appear different in natural versus artificial light. Artificial lighting can be used to supplement when natural light isn’t abundant. 

Colors that reflect light are typically the best colors to use in a room with artificial lighting. Colors with a cool undertone give the maximum lighting effect and make the room seem more spacious. The best bathroom paint colors for low-light spaces are the following:

  • White
  • Shades of gray
  • Shades of blue
  • Yellow
  • Neutrals
  • Pastels

Accent walls are also a great way to help brighten a room with little natural light. Try painting just one wall a dark or bold color while painting the remaining walls a lighter shade like white or cream. The dark-to-light contrast opens the space and provides a unique decorating style. 

Best Bathroom Paint Colors for Your Home Conclusion

Paint has the power to quickly transform a room. However, choosing the right paint color for your bathroom can be tricky. Be sure to take into account the natural and artificial lighting situation around your bathroom. Bathroom design can have a profound impact on your mood, given it’s the room where we start out our day. Consider what vibe you want to create and what colors you’re drawn to. 

If you’re having a hard time making a color decision, don’t hesitate to contact PaintRite Pros. Our team of painting professionals can help you settle on the best color for your home as well as answer any other painting questions. We have an amazing reputation throughout the Elk Grove-Sacramento area because we love what we do and we do it well. 

Can You Paint Apartment Walls in California?

Free Estimate

How to Paint a Popcorn Ceiling

Posted on: September 14th, 2022

How To Paint A Popcorn Ceiling

If your popcorn ceiling needs a refresh, one of the easiest things you can do is give it a fresh coat of paint. Learning how to paint a popcorn ceiling is simple, especially compared to covering your ceiling or removing the texture completely. 

Chances are, if you have an older home, you probably have a popcorn ceiling. Popcorn ceilings were popular between the 1930s and 1990s because of the way they hide ceiling flaws as well as soundproof between floors. Since then, popcorn ceilings have gone out of style. Most new builds go for flat ceilings rather than any sort of texture. In fact, having popcorn ceilings in your home can decrease its value.

Wondering how to paint a popcorn ceiling? Read our guide to learn everything you need to know. 

How Long Does Paint Last?

How to Paint a Popcorn Ceiling

If your popcorn ceiling has become yellow and dull, you might be looking to redo your ceiling. Removing the popcorn ceiling is one option, but it’s messy and expensive. Painting your popcorn ceiling is an easy way to brighten and refresh your ceiling. Read our best tips on how to paint a popcorn ceiling: 

  1. Test your ceiling for asbestos. Asbestos was used in many popcorn ceilings because of its strength and resistance to heat. Unfortunately, asbestos can cause lung cancer and other health problems. In 1978, federal law banned the use of asbestos in products, but some that had already been manufactured were still sold on the market through the 80s. If your home was built in the mid-80s or earlier, you’ll want to test your popcorn ceiling for asbestos. Even if your ceiling does have asbestos, you won’t necessarily have to remove it. You’ll just want to be careful not to sand or drill the ceiling. 
  2. Protect your room. Painting your ceiling can be messy. You’ll want to cover your floors with plastic sheeting. Remove light fixtures or use painter’s tape to protect them. 
  3. Clean your ceiling. Popcorn ceilings are magnets for dust. Dust and grime on the ceiling will affect how well your paint goes on. 
  4. Cut in two inches with a paintbrush. You’ll want to do this around the perimeter, where the ceiling meets the wall, as well as around light fixtures and smoke alarms. Additionally, you’ll probably want to apply painter’s tape to the walls for clean lines. 
  5. Test your ceiling for previous finishes. This can be easily done by flicking small drops of water at your popcorn ceiling. If the water is quickly absorbed, the ceiling either has no previous paint or a coat that allows absorption. Water that beads indicates a glossy or semi-glossy finish.
  6. Load your roller with paint. Depending on how textured your popcorn ceiling is, you’ll want either a ⅜” (for fine to medium texture) or ½” nap (for heavier texture). Make sure you roll out some of the excess paint. 
  7. Apply the paint in a thin, even coat. Using a roller attached to a painter’s pole will be the easiest way to paint your popcorn ceiling. Make sure not to use too much paint. This can cause the popcorn ceiling to become too heavy and flake off. 
  8. Let the first coat dry. Wait at least two hours. If you live in a humid area, you may want to wait at least four hours between coats. Using a fan or opening a window in the room will help with airflow. 
  9. Apply your second coat of paint, going in the opposite direction to cover up lines and roller marks from the first coat. 
  10. After the ceiling has dried, touch up any spots that remain.  

Can You Paint Apartment Walls in California?

How to Clean a Popcorn Ceiling

When cleaning your popcorn ceiling, you’ll want to take special care. If your home was built in the mid-80s or before that, there’s a chance your popcorn ceiling has asbestos in it. When undisturbed, asbestos doesn’t pose a health risk. However, peeling, cracking, or drilling into the ceiling can release asbestos particles into the air. Breathing in asbestos puts you at risk for lung cancer, mesothelioma, and asbestosis. 

Unfortunately, popcorn ceilings are magnets for dust. The texture provides perfect pockets for dust to collect. Luckily, cleaning your popcorn ceiling is fairly simple. Follow these steps to clean your popcorn ceiling:

  1. Cover furnishings and floor with plastic tarps. 
  2. Mask up. You’ll want to wear a protective mask and goggles to protect your eyes. 
  3. Remove dust. You can use a broom, a vacuum cleaner, or duct tape on a roller to remove the dust. Make sure not to press too firmly. You don’t want to break off any of the texture.
  4. Clean the ceiling with your cleaner of choice. You’ll probably want to test a small, inconspicuous area before cleaning the whole ceiling. Warm water with dish soap works well for grease stains, while a solution of bleach and water can be used for water, smoke, and mildew stains. 
  5. Let the ceiling dry overnight. You can open windows or run fans to keep air circulating in the room. 

Type of Paint to Use

If you’re wondering how to paint a popcorn ceiling, you probably want to know what kind of paint to use. The best type of paint to use for your popcorn ceiling is an interior acrylic-latex. 

Additionally, most people use a flat sheen to paint their ceiling. Flat or matte paints hide imperfections better than glossier sheens. And while flat paints are harder to clean than satin sheens or above, you’re not likely to need to clean your ceiling very often. 

How Much Paint You’ll Need

One gallon of paint usually covers 400 to 500 square feet of flat ceiling. However, because popcorn ceilings have more surface area to cover, you’ll need at least double that amount. When painting your popcorn ceiling, expect to use two gallons of paint per 400 to 500 square feet of ceiling.  

How Much Does It Cost to Remove Popcorn Ceiling?

If after learning how to paint a popcorn ceiling, you’d rather have the texture removed altogether, you probably want to know the cost. The cost to remove popcorn ceiling from your home will depend on the asbestos risk and the size of your home. Typically, contractors charge $1 to $2 per square foot of removal, with an average range of $1,010 to $2,060 for the whole project. 

Tools Needed

If you’re looking to DIY your popcorn ceiling removal to save some money, you’ll need a few tools to do the job. 

  • Plastic sheeting to cover everything in the room
  • A 6” to 12” ceiling texture scraper 
  • A mud pan to catch as much mess as you can
  • A pump sprayer to wet the ceiling before removal
  • Painter’s tape to cover electrical junction boxes in the ceiling

Benefits of Hiring a Professional

Although DIY might be tempting, hiring a professional like Paintrite Pros to remove your popcorn ceiling comes with a lot of benefits:

  • Prep work and clean up is taken care of for you.
  • Less chance of damaging the substrate, which is costly to repair. 
  • Work is guaranteed.
  • Avoid injury from craning your neck and working on a ladder.
  • Avoid exposure to lung-damaging asbestos. 

Professional Popcorn Ceiling Removal in Sacramento

If after learning how to paint a popcorn ceiling you decide you’d rather have it removed, it’s time to call in the professionals at Paintrite Pros. With over 25 years of experience in the Sacramento area, we have the experience to remove your popcorn ceilings safely and efficiently. We guarantee our work from start to finish. We serve the entire Sacramento area including Dixon, Roseville, Stockton, and more!

Can You Paint Stucco?

Free Estimate

Do You Paint Walls or Trim First? 

Posted on: July 15th, 2022

Do You Paint Walls or Trim First?

People often wonder what the best order is to go in when painting a room. Do you paint walls or trim first? From a professional point of view, with interior painting, it makes the most sense to paint your trim first, then ceilings, and then your walls. It’s much easier and faster to tape off trim than to tape off your walls. And you definitely don’t want the hassle of taping them both. With this system, you don’t have to worry about neatly painting your trim because any paint that gets on the ceiling or walls will be painted over. Just be sure to get a smooth finish on the trim. It’s important to let your trim dry for a full 24 hours before moving onto the ceiling. 

If you live in the Sacramento area and need help painting your house, we can help! Click the button below to get your free painting estimate!

Best Paint Stores in Sacramento

Get Free Estimate

How to Paint a Room Step by Step 

Before you start any painting project, gather all the supplies you’ll need. This makes the job run smoother and you won’t have to waste time running to the hardware store. Here is a list of items we recommend compiling before you start painting: 

  • 2 ½ in angled brush for trim and cutting in 
  • Painter’s tape 
  • Ceiling paint 
  • Baseboard and trim paint 
  • Drop Cloth 
  • ⅜ in nap roller, frame, and paint tray 
  • Stir sticks 

With all your paint and supplies ready to go, you’re all set to move forward with your project. 

  1. Choose Wall Color and Sheen 

Choosing the desired paint color can either be really exciting or extremely daunting. So many options can be overwhelming. We recommend you head to your paint center and have them mix samples for you of your 3 favorite colors. Once home, apply these samples on different parts of the room to get a feel for the one you light best. Keep in mind different lighting in the room at different times of the day will change the color drastically. When it comes to choosing a finish or sheen, it will mainly depend on what type of room you’re painting. Bathrooms and kitchens do well with a semi-gloss finish as they are durable and helpful in areas that need to be cleaned regularly. A satin finish has a little shine to it and is extremely versatile for bedrooms and other living spaces. High Gloss is the best choice for your trim, cabinets, and doors. 

  1. Prep Walls 

Before getting started, it’s a good idea to wash your walls and trim. This gets rid of any dust or residue that could clump when you paint. Next, check your walls for any nail holes, dings, and dents. Fill them in with putty, let dry, and lightly sand. Always apply a coat of primer over patched areas. Finally, remove the outlet and light switch covers. 

  1. Protect Your Walls and Furniture 

You’ll want to spread a drop cloth on the floor and over any furniture in the room where you’ll be painting. Fabric drop cloths are ideal but the plastic ones are inexpensive and can still do the trick. 

  1. Paint the Trim and Baseboards 

In most cases, we recommend painting your trim before your walls. Let the paint dry, then tape off the trim and move on to the walls. Using high-quality semi-gloss paint will protect the wood as well as leave a pleasing shine to your trim and baseboards. 

  1. Paint the Ceiling 

Painting your ceiling before your walls will avoid paint splatters on your wall. Paint the edge of the ceiling along the perimeter of the whole room with a 2 ½ in. angled brush. This process is called “cutting in”. Then use your ⅜” nap roller to paint the ceiling from one end to the other. Roll the paint in the same direction. If it needs a second coat, roll the paint in the opposite direction as the first coat. 

  1. Cut in the Walls 

It’s a smart idea to cut in one room at a time. Then, immediately roll out the wall while the cut-in paint is still wet. This step eliminates an obvious line where different brushes were used. Paint along the edges of trim and baseboards as well as the entire perimeter of the ceiling. 

  1. Roll On Wall Paint 

After opening your paint, be sure to stir it thoroughly with a stir stick. Fill your roller tray half full with paint. Load your roller and paint away from the baseboards in the direction of the ceiling. Roll straight back down to ensure the wall is covered. Overlap each stroke along the edge to avoid lap marks.

If you need to take a break but aren’t finished with your brushes yet, don’t waste paint and time washing them just yet. Simply place your roller or brush inside a ziplock bag and seal. This will prevent the paint from drying out and give you time to eat dinner or run an errand without all the unnecessary clean-up. When you’re ready to start up again, pull them out of their bags and they are ready to go. 

  1. Remove Tape and Clean Up 

Once your paint is nearly dry, remove the painter’s tape from the trim and baseboards. Score the edge of the tape where it meets the wall. This can be done with a flexible putty knife and facilitates a nice, clean edge. Be sure to thoroughly clean your paint brushes with soap and water immediately after use. Wait too long and the dried paint can be very difficult to remove. After the paint is completely dry and no longer tacky, replace all outlets and switch covers. 

How to Use Black Ceiling Paint

How to Paint Trim After Walls are Painted 

If you choose to paint your trim after your wall, start with prep work. Wipe down all trim and baseboards with a damp rag to remove any dust or dirt. It may take a little time but use painter’s tape around all trim and baseboards to avoid getting paint on your floor or walls. This also ensures a crisp, clean paint line when the tape is removed. Using an angled trim brush, apply your first coat of paint. After it has completely dried, add another coat. You’ll want to wait to remove the tape until the paint has had a good amount of time to dry but isn’t fully dry yet. Leave the tape on too long and it could compromise the old or new paint and you won’t be happy with the result. 

How to Paint Walls 

When it comes to painting your walls, there are a few tricks that will make a more cohesive, finished product. When painting areas next to the trim or corners with a paintbrush, the texture will be noticeably different than the portions painted with a roller. For the best results, after you brush on the paint, immediately roll out the same areas before the paint has a chance to dry. You can find a 3 in. roller at any big box or paint store. Just be certain the nap and thickness of both rollers used are the same. Do this section by section so it all looks uniform in the end and no part is forgotten.

It can be very frustrating to avoid lap marks on your walls when painting. Most people don’t know that they can avoid these uneven marks by keeping a wet edge at all times. This means that instead of painting in the familiar “W” pattern, you make sure each stroke of your roller overlaps the one before it while running the roller the full height of the wall. The unsightly marks appear when painting over sections that are already partially dry. Feather out your paint on large areas like ceilings where you can’t keep a wet edge to minimize lap marks. These techniques will also avoid you having to apply multiple coats of paint to get the uniform look you want.

Where to Purchase Paint Supplies in Elk Grove-Sacramento

There are several great options in the Elk Grove-Sacramento area to purchase paint and paint supplies. Here are a few that offer excellent quality products along with all the tools and materials you need.

Sherwin-Williams Paint Store-Elk Grove 

9716 Elk Grove Florin Rd. 

Elk Grove, CA 95624 

916-686-6034 

Behr Paint Store-Elk Grove 

9150 W. Stockton Blvd. 

Elk Grove, CA 95758 

916-478-2388 

Do You Paint Walls or Trim First Conclusion 

Depending on who you talk to, you might get different answers to whether you should paint your walls or trim first. However, over our years of experience we have found what process works and we stick by painting trim first, ceilings, then walls. 

If you have a painting project in your future or just have questions, give PaintRite Pros a call. We have years of experience painting homes in the Sacramento-Elk Grove area including, Stockton, Roseville, El Dorado County, and more! We’ll gladly help in any way we can. 

Can You Paint Apartment Walls in California?

Get Free Estimate

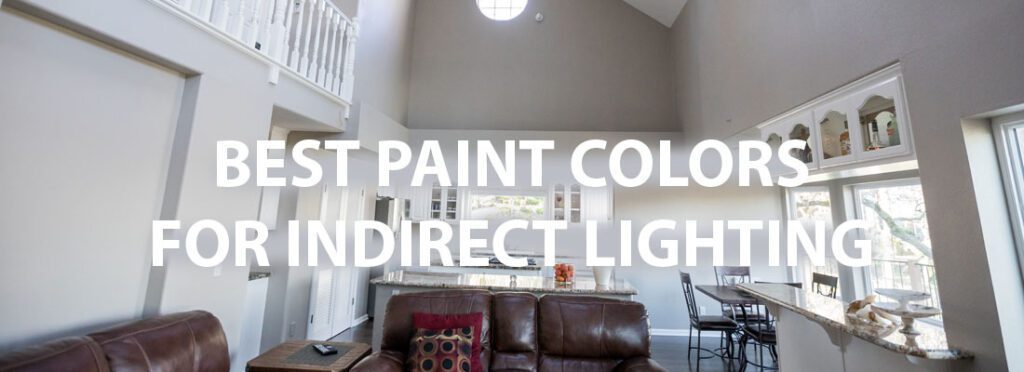
Best Paint Colors for Indirect Lighting Guide 

Posted on: May 26th, 2022

Best Paint Colors For Indirect Lighting

There are several factors that should be considered when deciding which paint color to choose for your interior walls. The best paint colors for indirect lighting are found while keeping your design scheme, lighting, furniture, and the direction that your room faces in mind.

For example, the color you choose for a room with lots of windows and natural light may not look the same when used in a smaller space with no windows. If you want to learn how to select the perfect paint color for every room in your home, no matter what the indirect lighting may be like, read ahead for PaintRite Pros’ complete paint guide. 

Best Paint for Indirect Lighting 

When a space lacks natural light, it becomes darker as the daylight fades. So what paint colors are best in these situations? The color you choose can either accentuate the dimness or add an element of brightness. Lighter and warmer shades tend to do an excellent job of visually expanding the darker space and inviting in the light. 

Light Room Colors 

  • Benjamin Moore Navajo White OC95-This neutral is a creamy white color with yellow undertones. 
  • Sherwin Williams Tidewater SW6477- Tidewater is a blue-green color with cool undertones, ideal for bedrooms or dining rooms. 
  • Behr Silver Mine PPU26- Silvermine is a dusty blue that can appear a cool gray. It looks crisp and bright even with minimal amounts of natural light. 

Tips to Brighten a Dark Room 

Not all rooms in your home will have copious amounts of natural light. But there are simple things you can do to maximize the light within the space you’re working with. Here are a few tips on how to brighten up a dark or small room: 

  1. Paint the ceiling white. White is known for reflecting light which can help the room appear brighter. 
  2. The furniture and wall decor you choose for any space can really enhance the overall feel of the room. Choose pieces that compliment your wall color but that won’t distract at the same time.
  3. Go for a bold trim. Bright white baseboards, trim, or crown molding can make any room look crisp and bright. 
  4. Choose a glossy sheen. A glossy finish will reflect the maximum amount of light available. However, too much sheen in your paint and every flaw or imperfection in your wall will be on showcase. Eggshell is always a great choice. 
  5. Lighter paint colors such as creams, whites, and pale yellows reflect natural light and are excellent at livening up any space. 

Bright Room Colors 

Low ceilings, small windows, and awkward angles are all components that can tend to make a room feel dark. However, choosing the right paint colors can instantly affect your room’s brightness factor. The perfect color can lighten even the dingiest of spaces. 

Injecting an element of sunshine is a great way to lighten things up. Yellow paint tones always add warmth to a dull space. A muted terracotta can also add vibrance and warmth. Just be careful not to pair either of these bright tones with too many brown accents. The darker tones of the brown may distract from the sunny vibe. 

How Sunlight Affects Color 

Sunlight plays an important role in how a paint color looks once on your wall. As sunlight makes its way across the sky, the amount of natural light entering your home changes. Ever notice how your dusty blue bedroom may appear gray once the sun has set? When the angle of the sun changes, your paint color will change right along with it. 

Paint Colors for Rooms with Lots of Natural Light 

If you’re lucky enough to live in a home drenched in sunshine, you have the chance to experiment with a myriad of paint colors. Whatever direction you decide to take, here is a list of tried and true colors for rooms with an abundance of natural light. 

The Best Sunroom Paint Colors 

  1. White 

White is a timeless classic and an obvious choice for a room with natural light. But each white shade comes with an undertone that is warm or cool. Consider your flooring, furniture, and wall decor as you determine which shade of white will work best for you. 

  1. Powder Blue

It’s no secret that soft blues are back by popular demand. With its calming vibe, powder blue is rising in popularity for essentially any room in your house. Blue reflects the beauty of nature and welcomes it into your home. 

  1. Purple 

Purple, along with other berry and jewel tones are definitely trending this season. Fanciful yet sophisticated, this color can adapt to any room filled with light. 

  1. Beige 

You can never go wrong with beige. It works beautifully in an open floor plan and easily pairs with a dash of bold bright color to add personality and depth. 

  1. Orange 

Not just everyone is bold enough to use the color orange in their home. However, the right shade in a room with the right lighting can add energy to any space. 

Best Paint Color for Western Exposure 

Rooms with western exposure tend to get more warmth and light in the evening than in the morning. These rooms can appear drab in the morning but may be flooded with warmth as the sunsets. This abundance of light in the evening can make a yellow-toned color too overpowering. We recommend cooler hues of green or cream to balance out the light. West-facing rooms with a lot of windows will certainly let in light and along with it, heat. Soft green is an excellent choice to allow plenty of exposure without being too dramatic. 

In the long run, whether you choose a neutral such as cream or a cooler tone like sage green, you’ll love bringing new life to your western-facing space. Utilizing the right paint shade is by far the most cost-effective way to instantly enhance and transform your room without adding expensive skylights or windows.

How Much Does A Gallon Of Paint Cover?

Best Paint Colors for East Facing Rooms 

East-facing rooms receive lots of cool morning light. So, ideally, a color that works with the brightness of the morning as equally with the twilight is what you’re looking for. You need a color with warm undertones for additional warmth in the afternoon. An autumn color palette composed of yellows, oranges, and reds are all excellent options. If you want to keep things simple, neutral cream or beige will glow with the remaining sunlight of the day. 

Best Colors for South Facing Rooms 

A south-facing room has endless possibilities. The light gets warmer closer to the evening hours. They typically enjoy clear natural light so any color you choose will adapt nicely. With that said, shades with cool undertones like purple, green, and blue, are a nice way to offset the intense sunlight streaming in. Your unique space will be the determining factor.

Best Colors for North Facing Rooms 

North-facing rooms are unique in that they don’t get any direct sunlight. Because these rooms naturally have cooler undertones due to the lack of natural light, warmer tones are an excellent equalizer. Choose a paint color with the right amount of warm and cool undertones and consider the brightness of the paint color. White, gray, and neutral paint colors are all popular solutions for north-facing rooms. 

Don’t Forget the Finish 

Some finishes reflect light while others absorb it. Do you want more light or less? Too much light can be distracting and draws people’s attention to any dents, scuffs, or flaws on your wall. Not enough light and your room can look drab and unwelcoming. Steer clear of using high gloss finishes on bright walls as it may be overpowering. Reserve high gloss paint for high traffic areas and trim. A flat matte or eggshell finish provides the right amount of sheen for your basic interior walls. 

Best Paint Colors for Indirect Lighting Conclusion 

The important thing to remember when deciding on a paint color is to strike a balance between the cool and warm tones. It’s also a good idea to add artificial lighting to areas lacking natural light. This may be especially helpful in darker areas of your home like hallways, basements, and powder rooms. Because no matter how you look at it, the presence or absence of light has an impact on your paint color. 

At PaintRite Pros, our experienced team can answer all your painting questions. As the top-rated painter in Elk Grove, we offer a variety of high-quality painting services to people throughout the Sacramento County area. Our experts have more than 25 years of combined painting experience and it shows. We’ll do everything to make sure you’re as thrilled with our work as possible. 

We understand the value of what it means every time someone chooses a painting contractor. That’s why we work hard to ensure you’re happy once the project is finished. When you want professional painters at a great price in Sacramento, you need PaintRite Pros.

Best Sacramento Paint Supply Stores

Request A Quote

Can You Paint Apartment Walls in California?

Posted on: March 21st, 2022

Can You Paint Apartment Walls In California?

With nearly half of California’s households being classified as renters, it makes sense why people often wonder, “Can you paint apartment walls?” We all know the instant effects a fresh coat of paint can have on brightening up a room and making it look new again. It’s known to be one of the least expensive ways to upgrade any space and personalize it to feel like home. So if a renter is willing to do the work themselves and cover the product cost, are they allowed to paint their apartment walls in California?

If you live in the Sacramento area and need help with your interior painting, click the button below and we’ll give you a free estimate!

Get Free Estimate

Can you paint walls in a rented house? 

Everyone wants to add their own sense of style and personal flair to their home or apartment. A landlord that allows his tenants to have some freedom with painting may give them a powerful sense of ownership which could lead to them renewing their lease longer and even treating their rental more like their own. Every landlord dreams of a tenant that will treat their rental with respect and care. Allowing these kinds of modifications is entirely up to the landlord but may prove to be of benefit if kept within certain restrictions. 

Why you shouldn’t paint your apartment? 

Landlords often pay professional painters to paint the interior walls of apartments they are leasing. This ensures the job is done well. Oftentimes, when a renter tackles a project like this, they don’t follow proper steps and may cut corners. Renters don’t always take the time to spackle holes or dents, tape off all windows, edges, and baseboards, or they may apply a cheap brand of paint that won’t hold up well over time. Also, if a dark color was used, it would take several coats to restore the walls to a cream or white. 

Painting without the landlord’s permission can be seen as an act of vandalism as it technically is damaging someone else’s property. Doing so could result in your landlord retaining a portion of your deposit.

Can I be evicted for painting my apartment? 

Typically, property management companies and landlords avoid evicting tenants. While they may be upset, it’s unlikely your landlord would be able to evict you just because you painted the walls without consent. Keep in mind that most judges won’t be too sympathetic to a lawsuit involving your tenant providing a free paint job. However, your landlord may require that the walls be returned to the original color and condition when it comes time for them to vacate. Also, a portion of their deposit may be used to cover those costs. 

Resilience Paint vs Duration vs SuperPaint

What happens if you paint your apartment? 

A tenant has the responsibility to leave a rental unit in the same condition that it was in when they moved in, minus the typical wear and tear. A proper rental agreement should indicate what modifications may be made by the tenant. This should include statements permitting physical modifications to be made upon permission from the landlord. It should also state if absolutely no modifications are allowed. The language chosen in a rental contract should give the landlord the right to decide whether to allow renters to repaint or not. 

If you paint your apartment walls without the proper consent from the landlord, they have the right to bill you to repaint the walls back to the normal color when you move out. Essentially, you’ll be paying a professional to undo what you’ve done. And as mentioned above, you could lose a portion of your deposit as well as cause a rift in your relationship with the landlord. 

What if your lease doesn’t mention anything about painting?

If you’ve carefully read over your lease agreement and it doesn’t mention anything about alterations or modification, you are probably fine to go ahead and paint. Here are some things to keep in mind if you are considering painting your apartment walls: 

  1. Check with your landlord 

We strongly recommend contacting your landlord before picking up a paintbrush just to be certain. Communication is key and may save you from facing grief in the future. It’s always wise to maintain a positive relationship with your landlord. Keep that in mind before moving ahead with any changes. 

  1. Restore to the original color or condition 

Sometimes it will specifically state in your rental contract that the property must be restored to its original condition. This protects the landlord from the tenant going overboard with their personal and unique decorating style. If you happen to get permission to paint, remember that you will more than likely have to repaint to the original color. Be careful to avoid colors such as red and pink which can be a nightmare to paint over. 

  1. Careful with the color 

You might absolutely love the color purple. However, other renters may not. Color is an individual preference. White and cream are by far the most desired wall colors for apartments. Apartments and rental homes painted white or off-white rent quickly. They make smaller rooms appear more spacious, are pleasing to the eye, and match with everything. So remember to stay with neutral tones to avoid complaints from your landlord.

What if the walls are in really bad shape? 

State and local laws may slightly differ on this topic. However, in most cases, the courts rule that the landlord is responsible for repairing and repainting damaged walls. This is especially true if the tenant has been living in the rental for multiple years and the walls could use a fresh coat of paint due to basic wear and tear. Contact your landlord and put in a request to have the walls painted. However, the cost and responsibility would fall to the tenant if the walls are in abnormally bad condition shortly after moving in. 

Can You Paint Apartment Walls In California Conclusion 

To summarize, it may be completely fine to paint your apartment walls in California. But, always contact your landlord first and carefully read over your rental agreement to verify and receive approval before taking action. It’s always better to be safe than sorry! 

If you live in the Sacramento area and have painting questions concerning commercial, residential, or rental properties, contact PaintRite Pros. Our experts have more than 25 years of combined painting experience and it shows. Click here or the button below to get your free interior paint estimate or give us a call. We serve the entire Sacramento area including Dixon, Roseville, Dorado County, and more! Tambien, hablamos Espanol!

Get Free Quote

How Much Does It Cost To Paint Home Interior?

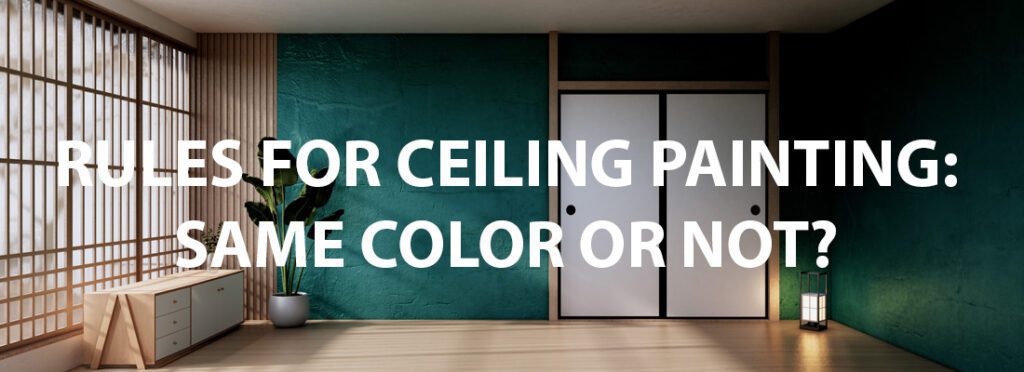
Rules for Painting Ceilings: Should the Walls and Ceilings be the Same Color? 

Posted on: February 26th, 2022

Rules for Ceiling Painting: Same Color As Walls or Not?

When it comes time to give your interior walls a fresh coat of paint, what are the rules for painting ceilings? What color should you paint it to enhance the mood and feel of your home? So much of the answer will depend on what space you’re working with and your own personal style. There are several different paint color options that have an effect on finding an aesthetically pleasing combination. So let’s explore some basic rules for painting ceilings that will leave you excited once your project is finished. 

If you’re in the Sacramento area and need your ceiling painted, our experts will do a great job and give you a free estimate. We can paint your walls, kitchen cabinets, and even do your exterior painting whether it’s residential or commercial. We even do apartment painting.

Get Free Quote

Do I Have To Prime Before Painting?

Painting Ceilings Same Color as Walls 

Many people wonder what the pros and cons are of painting your ceilings the same color as your walls. Painting the ceiling and walls the same color for certain spaces works perfectly well but isn’t always ideal. For the most desirable look, we’ve found that using either dark or light colors of the paint spectrum look the best. Sometimes those medium paint tones don’t create the eye-catching results hoped for. 

It’s said that painting your walls and ceiling the same color has the ability to make your room look bigger. The idea is that the seamless transition from walls to the ceiling will draw your eyes upward, giving the illusion of more space. You might not believe it, but this concept works especially well with crown molding. When painting the same color as the ceiling and wall, crown molding can add height to your room. 

Pros of Painting Ceilings and Walls the Same Color: 

  • Painting the walls and ceiling the same color is faster and less expensive than purchasing two separate colors of paint. 
  • It can help make the ceiling look higher. 
  • Painting walls with angled walls and ceilings the same color can avoid making the room look and feel choppy. 
  • You avoid the worry of using conflicting undertones. 
  • It can bring a cozy feeling to a large room. 
  • It creates a seamless look. 

While there is no clear answer if using different colors for your walls and ceilings is best, in the end it will come down to personal preference. Ultimately, it’s your home and you should create a space you enjoy living in.

Cons of Painting Ceilings and Walls the Same Color: 

  • Sometimes painting your walls and ceiling the same color can make your room look closed-in or small, especially if there aren’t natural lighting sources. 
  • If you’re looking for a bold, contrasting look, using the same paint won’t be a great choice for you. 
  • If going with a bold or bright color, it may be too over-the-top to use the same color on both ceilings and walls. 
  • Using the same color can create a caved-in effect if there’s no other color in the room to break up the space. 
  • It can look too monotone or boring. 

White Ceiling 

White is by far the most popular color people use to paint their ceilings. A white ceiling reflects the most amount of light, creating the look of a larger space. White will allow your ceiling to showcase wall decor and furnishings. Another benefit of white ceiling paint is that it has the ability to cover imperfections and blemishes. White paint is easy to use and easy to touch up. Darker colors have a tendency to bleed through the tape and make any little mistake very obvious. Last but not least, white provides an illusion of depth. Dark ceiling colors have a definite visual stopping point.

Color Coordination Tips

What Paint Finish is Best for Ceilings? 

When choosing a paint finish for your ceiling, a flat or matte finish almost always works best. The glossier paint finishes such as semi or high-gloss, reflect more light and can be visually distracting. Ceiling paint should be durable enough to not crack or peel and be able to cover any stains or discoloration. We typically recommend flat, latex paint for textured ceilings.

Dark Ceiling, Light Walls 

Many homeowners are choosing to go with a dark-colored ceiling and lighter walls. Colors such as navy, dark brown, and even black are currently trending when it comes to ceilings. A darker ceiling comes with a host of benefits such as creating a modern, contemporary look. This dark-light color combo can also create a welcoming atmosphere. 

It’s important to note that if your room is small or has little natural light, a darker ceiling can soak up any remaining light, and make it feel closed-in and claustrophobic. For a room with tall ceilings and multiple natural lighting sources, a dark ceiling can be an excellent choice.

Light Ceiling, Dark Walls 

This is obviously the most common wall-to-ceiling combination since most people paint their ceiling some tone of white and is an excellent idea for small spaces. Also, if your furnishings are a lighter color, as is the style these days, they will really “pop” against darker walls. Some form of contrast can add depth and personality to your room. 

Best Ceiling Paint Color 

Due to personal preference, there’s no way to determine the best ceiling paint color. However, we can recommend a few of our favorites along with offering tips for choosing paint colors in general 

  1. Consider the decor and furniture in your room. Take color cues from the artwork, window coverings, and flooring. Be mindful of these elements when choosing a color. 
  2. Take advantage of paint samples. Choose a peel and stick color sample to leave up on your wall for a few days. This gives you the chance to see how you really feel about it. Paint can have very different appearances depending on its exposure to natural sunlight. 
  3. Neutral tones are never boring and never go out of style. 4. Consider how the color you may choose will coordinate with the color of adjoining or nearby rooms. 

White Ceiling Paint

Best Ceiling and Walls Color Ideas 

The ceiling, or fifth wall, often gets overlooked when it comes to color consideration. But your ceiling can be the perfect place to experiment with a bold new look. Below are a few ideas we’ve recently seen brought to life.

True Blue 

Blue has the ability to bring depth or tranquility to any space by bringing elements of nature inside. Consider pairing a sky-blue ceiling with cool gray walls. The blue ceiling can add a more playful touch to an otherwise sophisticated space. Blue has a long-standing reputation as a homeowner favorite spanning several decades. 

Black Magic

A darker ceiling can add a richness and “wow” factor to an otherwise ordinary room. Don’t let colors like black scare you away when they have so much to offer. Black walls and ceilings with bright white crown molding and trim will forever be a classic. Contemporary or farmhouse, you can spin the black-and-white theme in a variety of directions. 

Buy Black Paint

Neutral Tones 

If you love neutral and earthy tones, don’t feel that white ceiling paint is your only option. Try experimenting with a dusty pink or pale peach. These tones will give you a chance to add personality to your room while staying true to your minimalist nature. 

Rules for Painting Ceilings Conclusion

Ceilings can be frustrating and tricky to paint. If you have questions about painting your ceiling or just prefer a professional painting company to get the job done for you, contact PaintRite Pros. We offer a variety of superior painting services throughout the Sacramento County area including El Dorado County, Roseville, Woodland, and more. If you need a painting contractor in Yuba City, we recommend Silver Cloud Painting! Our experts have more than 25 years of combined painting experience and it shows. Contact us today for your free estimate! Hablamos Espanol tambien! If you’re searching for painters north of Sacramento in the Lincoln area, we recommend Diamond Star Painting. Or if you need home remodeling in Sacramento, we can recommend some companies to you for that as well!

Get Free Estimate

Color Coordination Tips

How to Use Black Ceiling Paint

Posted on: August 30th, 2021

With interior painting trends leaning away from more traditional colors and tones, black ceiling paint is quickly becoming all the rage. Gone are the days of boring, white ceilings. Homeowners are embracing big, bold, and going black. Your ceiling can be painted black to create a dramatic and unique space, helping architectural elements to pop, while adding elegance and charm to any room. 

Black has a reputation for making rooms feel gloomy and small. However, designers and homeowners alike are discovering the power this once misunderstood color can present. 

If you need to buy black ceiling paint and live in the Sacramento area, we recommend Sherwin Williams. That’s who we partner with because their paint is long-lasting and of the best quality.

BEST INTERIOR PAINT COLORS FOR SELLING A HOUSE

Rooms With Black Ceilings 

Painting your ceiling black creates an eye-catching focal point of interior design and can single-handedly define your room’s decorating style. Dark colors are impressive and glamorous. There seems to be an element of mystery and intrigue associated with black ceilings. The common prejudices about black paint that once existed among painters and interior decorators have gone the way of the wind. 

Other dark colors that have been adapted by designers for ceilings include graphite and charcoal gray, grays with a bluish hue, silver grays, and of course navy. Dark tones combined with bright white or other bold colors are a brave way to be creative and add personality. 

Black ceilings draw your eyes upward, giving the illusion that your walls may be taller than they appear. Tall ceilings are always a wow factor and are an extremely coveted selling point in the real estate world. People are more likely to remember a room as pleasing to the eye if it has high ceilings. When paired with lighter colors and designed properly, a black ceiling can actually make your room appear larger. 

How To Paint Basement Ceilings Black 

An unsightly basement ceiling isn’t something you want to stare at for years to come. Many partially finished basement ceilings have pipes or ductwork that is left exposed. Nobody wants that as their interior decor. Instead of paying a small fortune for drywall, a coat of black paint by a professional can smooth over all the unpleasantness. This black paint covering gives off an industrial feel that can work these days. Complete the look with corrugated metal siding and black blinds or window coverings. If you have a door leading into the basement, paint it black as well to tie it all together. 

Basement ceilings are known for having yellowed water stains as well as other spots that have randomly shown up over time. Black paint does amazingly well at concealing blemishes and discoloration.

Black Ceiling Paint 

Just like white paint, black ceiling paint has endless different shades to consider. Depending on the lighting and furniture, black can pull in surrounding shades, changing its appearance. Some black hues can appear more navy while others are grayer. The trick to discovering the right black is all in the undertones. Simply check out the other colors on the color strip and see if they are in keeping with your vision. Black is merely a dark version of some other color. Natural light helps showcase these undertones so study perspective black tones in different lighting to make the best choice. 

Another very important factor in determining the best black paint lies in the finish. High gloss paints add an element of sophistication and glamour but are harder to get looking perfect. Surfaces need to be smooth and blemish-free for glossy paints to look their best. Flat or Matte finishes soak up the light instead of reflecting it, creating an intimate, warm feel. A satin sheen meets flat and high gloss in the middle and gives off just the right amount of light and luster. 

Black Ceiling in Restaraunt

How To Paint a Black Ceiling 

Painting your ceiling black is virtually no different than painting it any other traditional color. The same technique, skill, and tools are required. But, there are a few things to consider to ensure a successful outcome. Darker colors aren’t as forgiving! 

  1. Pick The Proper Paint Sheen or Finish 

Pay attention to the light in the room you will be painting and the quality or state your ceiling is currently in. Both of these factors will help you determine what sheen will look best. Typically, a lower sheen paint works best for black ceilings. Stick with matte, eggshell, or at most, a satin finish for black ceilings. You don’t want too much reflection from a higher gloss paint. The flatter sheens also hide blemishes and imperfections ceilings tend to have. 

  1. Consider The Drying Time 

Darker paints are less forgiving when it comes to blending and roller marks. Don’t make painting with black or other dark colors a one-man show. Your team will need to work quickly. Once your edging has started to dry, it’ll be much harder to make it look fluid and cohesive with the main body of the ceiling or wall. Try your best to blend quickly when it comes to cutting in around walls and rolling your ceiling. 

If you have beautiful beams, crown molding, or other details in or around your ceiling, we recommend you hire a skilled professional. If your lines aren’t clean, with black paint there’s no hiding it. Painting professionals know how to create the perfect lines and edges even on the most intricate spaces. 

Black Ceiling Paint Design Ideas 

Some of you may be skeptical about the idea of painting your ceiling black. Well, rest assured, black ceiling paint is being used in all kinds of decorative manner. Here are some of the current trends utilizing black, and other dark colors for ceilings. 

  • Black Ceiling White Walls 

Black and white will always be a classic combo. No matter what style or trend you’re going for, black and white have the versatility to capture it. Whether you love modern farmhouse, contemporary, or are drawn to an elegant look, you can’t go wrong with black and white. Soft white paint, furniture, and accents are the obvious pairing match for black ceiling paint. The white creates a beautiful balance against the bold black. 

  • Kids Rooms and Playrooms 

You may not typically think of painting the ceiling of your child’s room black, but black can be a surprisingly creative choice. While black can add a modern flair or give sophistication and elegance, it can also be super fun. Black can be the perfect backdrop for a sky full of stars. You can create a glow-in-the-dark solar system for the child that is obsessed with outer space or Star Wars.

When your little one grows older and is ready to transition into something less childlike, the black ceiling presents several other options. Pick a light fixture or chandelier that fits your teen’s personality and it will really pop against the black ceiling. Incorporate the black into a car or sports motif or add Italian twinkle lights and bold bright wall color for your trendy teen.

  • Open Floor Plans 

Homes with open floor plans are popping up everywhere. This design makes a home that would normally feel small, appear large and spacious. Everyone wants a home that has room to roam freely in. Without walls and hallways cutting the home into pieces, light is free to flow. Even though people love open floor plans, it can be difficult for homeowners to add their own style. This is where black ceilings can shine. Try painting a division of space on your ceiling to partition your ceiling without actually losing any openness or flow. 

Are You a Risk-Taker? 

Using black paint in any variation in your home is risky and bold. Black isn’t usually the most obvious or first choice for most homeowners. That certainly seems to be changing. If you’re open to the idea of being bold with paint, then feel safe moving forward with black. People that maintain a classy, elegant style of sophistication are also primed for black.

Accentuating Architectural Elements 

If you happen to be lucky enough to have defining architectural elements in your ceiling, black is the perfect way to showcase them. Whether you have wooden beams, crown molding, or skylights, applying black paint will create depth and emphasize the details. Utilize the bold look of white pieces or beams against the black background to really make a statement. A certified paint professional may need to be called in to handle ornate details and ensure quality. You don’t want a shotty paint job to taint or play down these beautiful design pieces.

Conclusion on How to Use Black Ceiling Paint

If you’re looking into a paint project involving black paint or have questions concerning another painting project, give PaintRite Pros a call. Our team of experienced painting professionals, along with our creative design consultants, go above and beyond other paint companies. Our residential interior painters even do repairs on things like loose floorboards, nail cracks, and patchwork. Whether you’re looking to renovate your home or give it a color update, new paint can change a lot. We are ready to tackle any paint job in Sacramento, so you don’t have to! We serve the entire area including Roseville, Elk Grove, Stockton, and more! If you need your kitchen cabinets as well, we can do that for you too! Hablamos Espanol tambien!

COLOR COORDINATION TIPS

GREY INTERIOR HOME PAINT

How to Spackle: Tips From the Experts 

Posted on: July 21st, 2021

At one point or another, there will be dents, dings, or holes in the walls of your home that will need to be repaired. So, knowing how to spackle and fill in these holes yourself can be a very useful skill. It’s actually a very simple process to learn if you know the steps and have the right set of tools to work with. Whether your toddler threw his toy at the wall leaving a dent or you lost your footing while awkwardly carrying your new couch up the stairs, life just happens, and knowing how to spackle and patch minor damages lightens the blow. 

How Long Does Spackle Take To Dry? 

There are a few different factors to consider when determining the drying time of spackle. It’s important to note that there are a variety of different spackles on the market with varying dry times. Some are fast-dry and others may take significantly longer to process. Also, temperature and humidity play into things. Extreme hot or cold conditions slows down the drying time. And finally, if you’re filling a rather large area, plan on a much longer dry time. 

Fast-drying spackle may take only a few minutes to dry but it isn’t wise to start sanding or painting for at least another 1-2 hours. Normal spackles will take 1-2 hours to fully dry but we don’t recommend sanding or painting until a full 24 hours has passed and the drying is complete. 

How Long Should you Wait Between Coats of Paint

Joint Compound vs. Spackle 

People often assume that joint compound and spackle are the same product. While applied similarly, they are different products, each with its own pros and cons. Personal preference aside, these products will both patch holes but the size of the hole may determine which one to use.

What is Joint Compound? 

Joint compound has the consistency of plaster and is typically used for larger jobs. You may have heard it called drywall compound. Joint compound is made by mixing gypsum dust and water into a thick paste. For your convenience, it often comes in pre-mixed containers so it’s ready to use. Here are a few of the benefits of choosing joining compound:

  • More dense, and all-around more durable 
  • Much easier to sand down than spackle 
  • Can use multiple layers to fill a hole or thicken a wall
  • Overall, less expensive than spackle 
  • A better choice for finishing drywall seams 

What is Spackle? 

Spackle has a consistency of paste but tends to be a bit drier than joint compound. It comes in lightweight and heavy options. Lightweight works great for smaller holes and dents and is made from vinyl. The heavy option is used to thicken walls or fill larger holes and is made from acrylic. Most people prefer to buy premixed spackle but you can certainly purchase the powder and mix it yourself when needed if you prefer. 

Here is a list of advantages of spackle: 

  • The best choice for filling small to large holes in your wall
  • Dries quicker than joint compound which means it can be sanded and painted over very quickly 
  • Doesn’t shrink as much as joint compound once it’s fully dry
  • Spackle is much easier to apply and spread due to the thinner texture

Do I Have To Prime Before Painting?

How to Spackle a Hole 

Before you get started on any DIY project it’s always important to have the proper tools and materials set aside. This will make any project run smoother and get finished faster than having to stop and search for a tool you may not even have in your possession. Here is a list of tools and material to have on hand. 

  1. Putty knife 
  2. Sandpaper 
  3. Spackle or compound of your choice 
  4. Rags for cleaning 

Step 1 

The first thing you’ll want to do is pick your compound. As we mentioned earlier, the size of the hole being repaired will be the biggest determining factor. A lightweight spackle includes a binding agent and works great for smaller holes. If your hole is as wide as ¾ inch, an all-purpose or heavy compound may be the better choice. 

Step 2 

Your next step is to prep the hole so the spackle will adhere well. Sand down any rough edges or debri from the perimeter of the hole until the edges are smooth.

Step 3 

Now you’ll want to mix or prepare the compound of your choice and apply it to the spot needing repair. If you purchased a powdered compound that needs to be premixed, be sure to only mix the amount you will need for the current repair you’re working on. You don’t want to throw money away by mixing more than necessary. 

Load your putty knife with a healthy amount of the spackling compound and apply in a downward motion starting at the top. 

Step 4 

Once you’ve completely filled the hole, you’ll want to level it off with your putty knife. Take care not to push too hard and pull putty from the hole. It doesn’t need to look perfect since you will be sanding over it once it’s completely dry. 

Step 5 

Use a damp cloth or rag to gently wipe any residual compound from the area you’ve been repairing. 

Step 6 

Most spackle compounds will shrink when drying. Go back and check to see if the patch has recessed. If so, simply apply another layer of spackle. Most holes deeper than ¼ inch need to be filled more than once. Don’t be concerned if an excess amount of spackle remains. The sanding step will smooth it out. 

Step 7 

Allow the spackling compound several hours to dry. Lightly sand the repaired area until it is smooth and flush with the wall. Wipe away any dust that is left behind. 

Step 8 

Now you are free to repaint the repaired area to match the rest of the wall.

Where to Buy Spackle in the Sacramento Area? 

Spackle and drywall mud are very easy to come by and can be purchased at almost any home improvement store in the Sacramento area. Capital Ace Hardware store along with Lowe’s, Home Depot, and Walmart are all convenient locations to purchase spackles. Whether you’re looking for premixed or powder form, you shouldn’t have any problem finding numerous options at these nearby locations.

How to Spackle Conclusion

If you live in the Sacramento area and have questions about how to spackle or any other questions regarding painting projects around your home, contact PaintRite Pros today. We offer a variety of high-quality painting services to people throughout the Sacramento County area. Our services include exterior house painting, kitchen cabinet painting, interior painting, garage floor epoxy, fence painting, commercial painting, ceiling painting, and much, much more. If you need a Sacramento handyman, we recommend hiring LnL Construction. 

Get Free Estimate

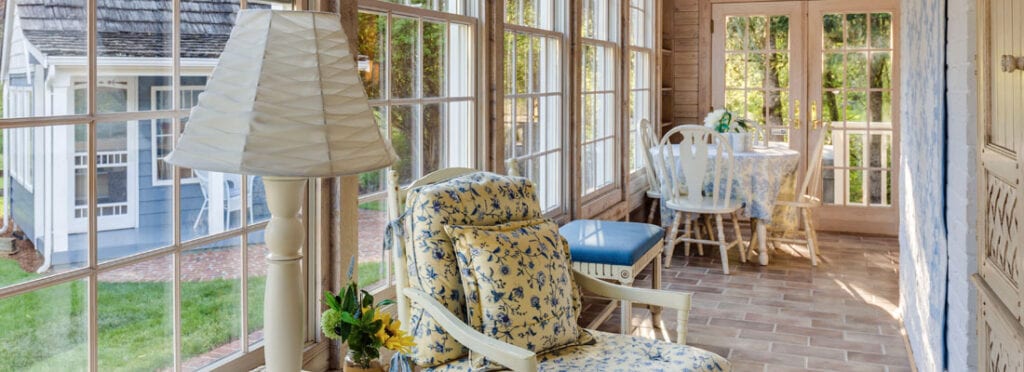
The Best Sunroom Paint Colors 

Posted on: June 17th, 2021

Sunroom Paint Colors

A sunroom is a magical space that allows you to enjoy the comforts of home and the benefits of the glorious outdoors at the same time. They exude light and relaxation and are considered a luxury as not every home is lucky enough to have one. Choosing the right sunroom paint colors will greatly enhance whatever mood or vibe you are looking to produce. If you can expand your sunroom to be an extension of your living space by creating a seamless flow, your home will seem even larger. If you live in the Sacramento area and need a company to paint the interior of your sunroom, give us a call and get your free estimate. Now that we’re done with the self-promotion. Let’s get into the best sunroom paint colors. 
How Long Should you Wait Between Coats of Paint

Stick With Neutral Tones 

Wonderful White 

Most sunrooms or sun parlors are typically smaller-sized spaces in your home. To enhance the size and make it feel as airy and open as possible, we recommend turning to neutral tones. White is an obvious and classic choice when contemplating sunroom color schemes. White will allow the warmth and light from the outside to brighten your room from the inside out. Chantilly Lace and White Heron by Benjamin Moore are an excellent choice for a cool white. Navajo White pulls in warmer tones for a cozy feel. 

Another benefit of white is that it pairs easily with a variety of bold and fun accent colors. Adding a punch of color in the form of throw pillows, floor rugs, wall decor, or picture frames is a wonderful way to add your personality to the mix. Try adding deep navy accents for a nautical theme, turquoise for a trendy vibe, or even bright yellow for a fun and playful atmosphere. 

If bold accents aren’t your style, stick with a natural vibe by adding accents steeped in nature. Lush greenery is always a perfect complement to any white or neutral pallet. You could also try incorporating an accent wall composed of brick, river rock, or shiplap. Natural furniture choices are also perfect selections for a sunroom. Bamboo, wicker, or teak will add an element of casual comfort. A major focal point of any sunroom is the windows. Don’t forget to utilize them when considering decor and style choices.

Consider the Undertone 

While white is versatile, classic, and trendy all at the same time, let’s not rule out the rest of the members in the neutral tone family. Beige, ivory, taupe, brown, and gray are all sunroom color options to consider. Neutral tones appear to be without color and don’t compete with primary colors. A neutral is created by mixing a pure primary color with a pure neutral color. So, each neutral carries an undertone from the primary color it was created from. These undertones are important to think about when choosing paint colors for your sunroom. 

The undertone of your color choice will greatly affect the overall look and feel of your room. Natural lighting most definitely plays into how your paint selection will turn out. Oftentimes, homeowners purchase a paint color after looking through dozens of paint swatches only to end up discouraged and disappointed when the color on their walls doesn’t at all resemble the color they chose. The effect natural light had on your paint wasn’t anticipated. 

We suggest a simple trick to avoid this pitfall. Try taping the different color swatches you are considering to your sunroom wall. As the lighting throughout the day changes, check in and see how your swatches may have changed along with the light. Full sun can make a color you deemed as a warm gray to appear more dusty blue then you had previously thought. The absence of any natural light may bring out cool undertones when the rest of your decorating pallet is warm. 

Brighten with Yellow 

It’s safe to say that when we think of a sunroom, hues of yellow come to mind. With its natural and warm allure, there are countless yellow tones that are the ideal sunroom colors. Yellow seems to call out an invitation to the sunshine and brightens any room. Benjamin Moores’ Hawthorn Yellow adds a soft, golden touch. Banana Yellow, also by Benjamin Moore is a bold choice that is currently trending. 

Get the Blues 

It’s no secret that blues of all shades and hues are making a comeback. There is a blue for every room in your home, not excluding your sunroom. With the nature of a sunroom being to induce calm and relaxation, why not

consider blue? Depending on the shade you choose, blue can create an extremely wide range of emotions. From moody and serene to energetic and bold. Some of the top-selling sunroom paint colors in blue tones are Partly Cloudy by Behr and Honest Blue by Sherwin-Williams. 

Go Bright and Bold 

Maybe you aren’t the sort of person that’s drawn to neutral tones. Maybe you love to be a bit unique and would prefer to be bold when it comes to decorating. A sunroom is an ideal space to show a little flair and personality. Painting a brightly colored accent wall is an easy way to pack a punch. Hot pink, bright green, orange, electric blue, or even black are all exciting options. Black can be a very smart choice, especially when paired against white. Try keeping your walls white and painting any trim black. The contrast is eye-catching and a very popular look. 

Drawing the Outside In 

Always honor and be true to your surroundings when decorating your sunroom. Keep in mind the outdoor elements when choosing paint shades and colors. The location of your home can often assist in helping with your decorating pallet. For example, if your home is located on a coastline, your color scheme may consist of dusty blues and tans with a splash of navy. Located in the hotter, arid, or desert states, you may lean toward pale pinks with coral and green accents. For a mountain home or cabin, warm earthy tones of brown, gold, tan, and green are appropriate and inviting.

Conclusion 

If you live in or around the Sacramento area and have questions about painting your sunroom or any other painting projects, give PaintRite Pros a call. Our professional technicians will be more than happy to assist you in choosing the best color for your project. We take into account all the lighting details when presenting you with color options. 

With a team of expert painting professionals, as well as friendly customer service and creative design consultants, we go above and beyond other painting companies. We take the time to do the job right and exceed your expectations. We also offer services such as exterior painting, kitchen cabinet painting, and garage floor epoxy and serve the entire Sacramento area including Folsom, Roseville, El Dorado Hills, and Stockton.
FREE ESTIMATE

Best Interior Paint Colors for Selling a House 

Posted on: May 18th, 2021

When people first step foot in your home, the color of your walls can leave a negative first impression or wow them with classic simplicity. So, what are the best interior paint colors for selling a house? Buyers often remember a property they have looked at by its flaws or features that stand out in a negative way. “That house with the Pepto pink bedroom”, or “That awful orange wall in the basement” is not how you want buyers to be talking about your home. You don’t want the wrong colors hindering the sale of your home and depreciating the value of your property. 

Thankfully, paint is one of the easiest and most affordable ways to upgrade your home and get it sell-ready. Let’s explore what the trending interior colors are that can help you sell and get top dollar for your home.

How to Spackle: Tips From the Experts 

Neutral Tones 

Realtors and decorators across the board agree that neutral tones are always a win when it comes to the best interior paint colors for selling a house. Neutral colors are appealing to a wide range of people and coordinate with multiple color palettes. Tones of a neutral nature enable potential buyers to visualize themselves living in your home. They have been a hit with buyers for decades. 

The key is to choose an undertone that compliments your furniture, flooring, and window coverings. Every color of paint has an undertone that is either warm, cool, or neutral. 

  • Warm Undertones

    Colors with a warm undertone originate from a base of red, yellow, or orange. Beige, tan, and cream are extremely flexible neutrals that fall in the warm category. Many people are drawn toward warm tones because they are inviting, cozy, and upbeat. Colors with warm undertones are a beautiful complement to natural light and are often associated with energy and playfulness. If you want a room to feel more spacious, warm tones are a great choice.

  • Cool Undertones

    Cool shades have a base that is in the realm of blue, purple, or even green. Calming and relaxing, these cool tones contribute to a sleek, soothing vibe. Popular in bedrooms and bathrooms, cooler hues can make a smaller space feel much larger. 

  • Neutral Undertones

    Neutral shades meet in the middle of the warm and cool tones as they are a perfect balance of both. Colors like white and grey can lean either cooler or warmer depending on their undertones. Add more yellow for warmth and bluer for cool.

Consistency 

When you are choosing the best interior paint colors for selling a house, interior decorators advise picking a color and staying consistent with it throughout your home. Stick with whichever neutral tone you have chosen for all connecting living spaces, including the entryway. Uniformity will make the entire painted area appear more open and spacious.

Lighting 

Don’t forget to factor in the influence lighting will have on your interior walls. Have you ever painted a room only to realize that the end result looks far from the color you had envisioned? This has everything to do with the type of lighting your room is experiencing. For example, the color swatch of your choice may look dusty blue when you are painting it on the walls during daylight hours. But, once the sun sets and all-natural light fades, your walls may appear gray. 

It’s important to consider the type of lighting that exists in the area you’re painting. A dark hallway without much natural light will need a color that works in artificial lighting, while a room filled with sunlight and windows will work best with a tone that reflects natural light. 

Most homeowners don’t enjoy bright lights filling their homes on a day-to-day basis. But, when selling your home, the lighter the better. Fill rooms that have little or no natural light with lamps containing extra bright bulbs. 

Best House Paint Colors

There are countless options to choose from when it comes to picking the most popular interior paint colors for selling your home. If you are struggling to decide amongst the myriad of swatches, it never hurts to see what’s trending in your own neighborhood. Look up recent home listings in your area for ideas of what buyers are drawn to and consider your options. 

Go Gray 

Shades of gray are without a doubt the most loved interior colors of the year. As a color that’s neither black nor white, gray is by far the most popular neutral. The cool hues have taken over beige or tan, which were long-time favorites. Gray is extremely versatile and suits nearly any interior style. It’s a perfect match with other popular neutrals such as beige, taupe, cream, or white. 

Once upon a time, gray was considered to be dull and boring. Now, it is revered for adding character to any home decor style. Gray can be paired with varying textures such as wood, leather, and greenery to add sophistication and depth. 

Wonderful White 

White, in all its various shades and hues, will always be a timeless classic. It’s one of the favorite standard interiors for good reason. White leaves future buyers with a clean slate and gives any space a fresh-kept appearance. Being neutral, it’s guaranteed to work with any style you choose. While white is classic, it isn’t always the best choice for every room. Areas of your home that are highly trafficked or where children will be playing would do much better with a darker color that won’t show dirt and scuff marks. 

One major advantage of white tones is their ability to reflect light and make any room appear larger and brighter. Airy white is a perfect fit for bedrooms and kitchens alike. 

Pale Blue

Soothing and soft, pale blue is making waves when it comes to popular interior hues. While blue isn’t considered a true neutral, pale blue is still versatile and muted enough to be a hit with homebuyers. Perfect for bathrooms and smaller spaces, pale blue nicely complements brick, shiplap, and bright white molding and trim.

Best Time of Year to Paint a House 

When you’re deciding on the best time to paint your house, make sure to choose carefully. We often assume that summer is the perfect time to give your home a makeover. While this can hold true much of the time, you need to consider the specific climate to where you live. The high humidity levels in certain locations can cause problems, especially if there is excessive water vapor in the air. This reduces the paint’s ability to adhere, making it more difficult to spread evenly. 

Winter can actually be a wonderful time to paint the interior of your home. In the winter, humidity levels are low. This ensures that your paint will dry faster and adhere to your walls better. Because many homeowners believe summer is the best time to paint, many painting professions are in high demand during the hotter months. During the winter months, the demand for interior painting services is significantly less which means cheaper quotes for you.

House Color Ideas by Room 

Select a Finish 

Before you pick your color for any room, consider the finish. The reflection and durability of certain finishes may affect which color you go with. Go with a high-gloss for kitchens and bedrooms and a satin finish for your living room. Eggshell works well in bedrooms. Glossy finishes are best for areas with heavy traffic where dirt and smudges easily occur because it’s really easy to wipe clean. 

Kitchen 

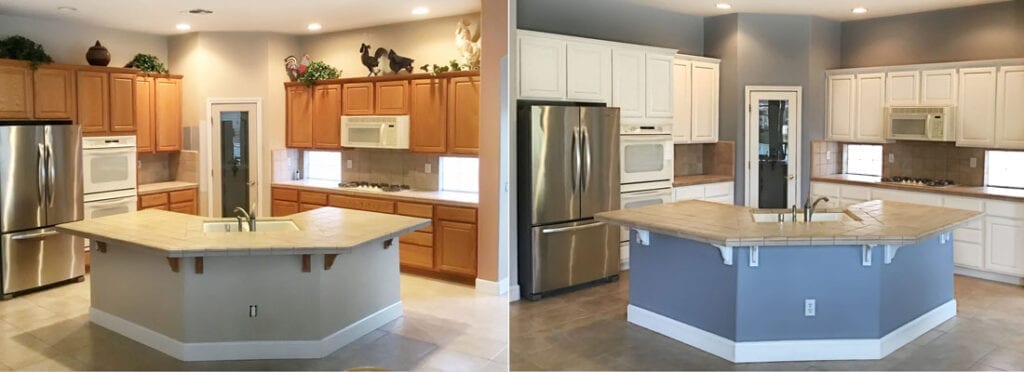
Before and After Kitchen Cabinet Colors

To make your kitchen light and airy, choose a color on the pale side, preferably in keeping with the other common areas in your home. You can add dimension by doing your island and cabinets in a slightly different shade. In the current market, when in doubt, you can’t go wrong with white cabinetry. 

Powder Room 

You can have a little more fun with the powder room or guest bath and vier from the color used in the common areas. Get creative and add some personality. But, don’t get too carried away. Even the guest bath needs to be buyer-friendly which is why sage green or light blue are recommended. 

Common Areas 

Common areas include your living room, dining room, and hallways. We recommend going with a shade of gray, beige, or white for these areas. A shade of a neutral nature that isn’t harsh or dark will appeal to a wide variety of buyers while showing uniformity. 

Bedrooms 

In ideal conditions, your common areas and bedrooms should all be painted the same color. If this isn’t a possibility, it isn’t the end of the world. Typically, buyers are the most forgiving of bedrooms as they tend to be of a more personal nature. Still, it is wise not to be too bold and bright as bedrooms should bring us to a place of calm and relaxation. 

Conclusion on Best Interior Paint Colors for Selling a House

If you’re thinking of putting your home on the market or just want to give your walls a fresh, new look, give PaintRite Pros a call. Our team of expert painting professionals, as well as friendly customer service and creative design consultants, will go above and beyond other painting companies. 

Whether you need professional painters to make your cabinets look new, or paint your home’s interior or exterior, fence, or deck, we can make it look just the way you want! Get your free estimate today! We serve the entire Sacramento area including Davis, Stockton, Elk Grove, El Dorado County, and more. We also have employees who speak Spanish fluently!

How Long Should you Wait Between Coats of Paint

Get An Estimate

Professional

Painting Services

Have questions about your residential or commercial painting needs? Contact us online or give us a call at 916-667-8050 to request a free estimate appointment.

Call Now